Showing posts with label Budget Dinner. Show all posts

Monday, May 9, 2011

Cooking from your Pantry – Real Macaroni and Cheese


You’ve just gotten in the door from work, and you’re starving. You look in to your sad, empty refrigerator and realize you desperately need to pick up some groceries. But what’s that?  You have cheese, milk and butter?  Some flour and short pasta too?  Even a stale piece of bread to make bread crumbs?  Never fear and stop reaching for that take out menu! You have in your empty pantry the very ingredients you need to make a DELICIOUS dinner, one that you’ll find yourself craving, even when your fridge and pantry are full. You’re going to make yourself some delightful macaroni and cheese!

Now, not only are you saving money by using what you have in your kitchen and not ordering in; you’re also eating vegetarian, which in and of itself can also save you money as protein is usually the most expensive part of any meal. The best thing about this dish, for you carnivores out there, is that it is so rich and satisfying that you probably won’t even realize there isn’t any meat on your plate.

I think this is the first dish that I learned to make from scratch, when I was probably 11 or 12. Since then, I’ve made it so many times I no longer need to look at the recipe.  Its simple, its easy, its tasty, it makes wonderful leftovers, it freezes well, and its inexpensive to make. What more could you ask for in a recipe?

Macaroni and Cheese – from Scratch
3c. your choice of short pasta (macaroni, penne, fusili, gemeli, whatevery you have)
2c. grated cheddar cheese, or whatever you have in your fridge
2c. milk
3tbsp. margarine or butter
3tbsp. white, all purpose flour
½ c. bread crumbs (take that stale piece of bread and buzz it up in your food processor or blender) OPTIONAL

  • Preheat your oven to 400F.
  • Put a pot with lots of water on to boil to cook your pasta.
  • Once you’ve got your pasta in cooking heat a large sauce pan over medium heat. Add the butter, and melt it down being careful not to let it burn.
  • Once the butter is melted, whisk or stir in your flour until a paste forms. Let this cook for a minute or two. This is a roux, and will thicken your sauce.
  • Slowly whisk in the milk. Be sure to keep the sauce moving so the milk doesn’t burn. This should thicken up. If it doesn’t, add a little more flour.
  • Once the sauce has thickened a bit, add 2 c. of the grated cheese and stir until melted through. Remove from the heat.
  • When the pasta is done cooking, drain it and mix it in with the completed cheese sauce. Mix it well, you want it to get into all of the nooks and crannies of your pasta. Trust me.
  • Pour this into a 9x13” casserole and top with remaining cheese and bread crumbs if you wish.
  • Bake until sizzling, and cheese on top is melted. About 20 minutes.
  • This can easily be prepared ahead and stored in the fridge, or even frozen. Just wrap it up before you bake it, and once you're ready to have it add between 10-20 minutes of baking time.
Notes on Cheese Choice:
Use up whatever you have in your fridge. The taste will vary depending on what you use, but I find that my most successful Macaroni’s are often those for which I use a mix of odds and ends of cheese. The last one I made was with a mix of gouda, mozzarella and old cheddar and it was great! I would probably stay away from types like feta because they don’t melt well. If you only have a block of plain old cheddar, well that’s really good too.

Notes on Pasta:
My favourite pasta to use for this is fusili. There is something about the way the cheese sauce gets into all of the crevices of the pasta that I find really pleasing. Really, any short pasta will work. A short pasta is just that, a short cut pasta that often has a hole in it, or rough edges to catch sauce. These include macaroni elbows, penne, ziti, fusili, rotini, gemelli, cavatapi, etc. My mom usually uses traditional elbows. Use what you have or what you prefer. It doesn’t affect the taste. The only type I wouldn't use is shells, because they all stick together and I don't like them.

This is a tasty yet inexpensive way to feed a crowd.   Always buy your pasta on sale, whether you use whole wheat, or normal, watch the flyers and every other week or so, one or the other is on sale. This past week I picked up a package of macaroni for only $1.  Bricks of cheese also are often on sale, usually once or twice a month Kraft or Cracker Barrell will be on sale for $5.  You only use ½ a brick for a macaroni, and would only use about ½ the bag of macaroni. If you get these key items on sale, then a large pan of macaroni will only run you between $5 and $7 and it can easily feed about 6 people, or even 8 if you’re serving a salad too. Or, it will feed 2 for one dinner, and two to three week-day lunches.

Monday, September 27, 2010

Hunkering Down for Winter Part 2: Your Very Own Tomato Sauce

Ok, so since it never stops raining in Ottawa these days, and since there's no denying that its officially Fall (check the calendar and then come and find me - we'll pout together) it's time for another installment of Hunkering Down for Winter.

So my man-friend was away this past weekend which left me with wondering what to do with all of my newly discovered free time. Of course, I turned to my good friend the kitchen.

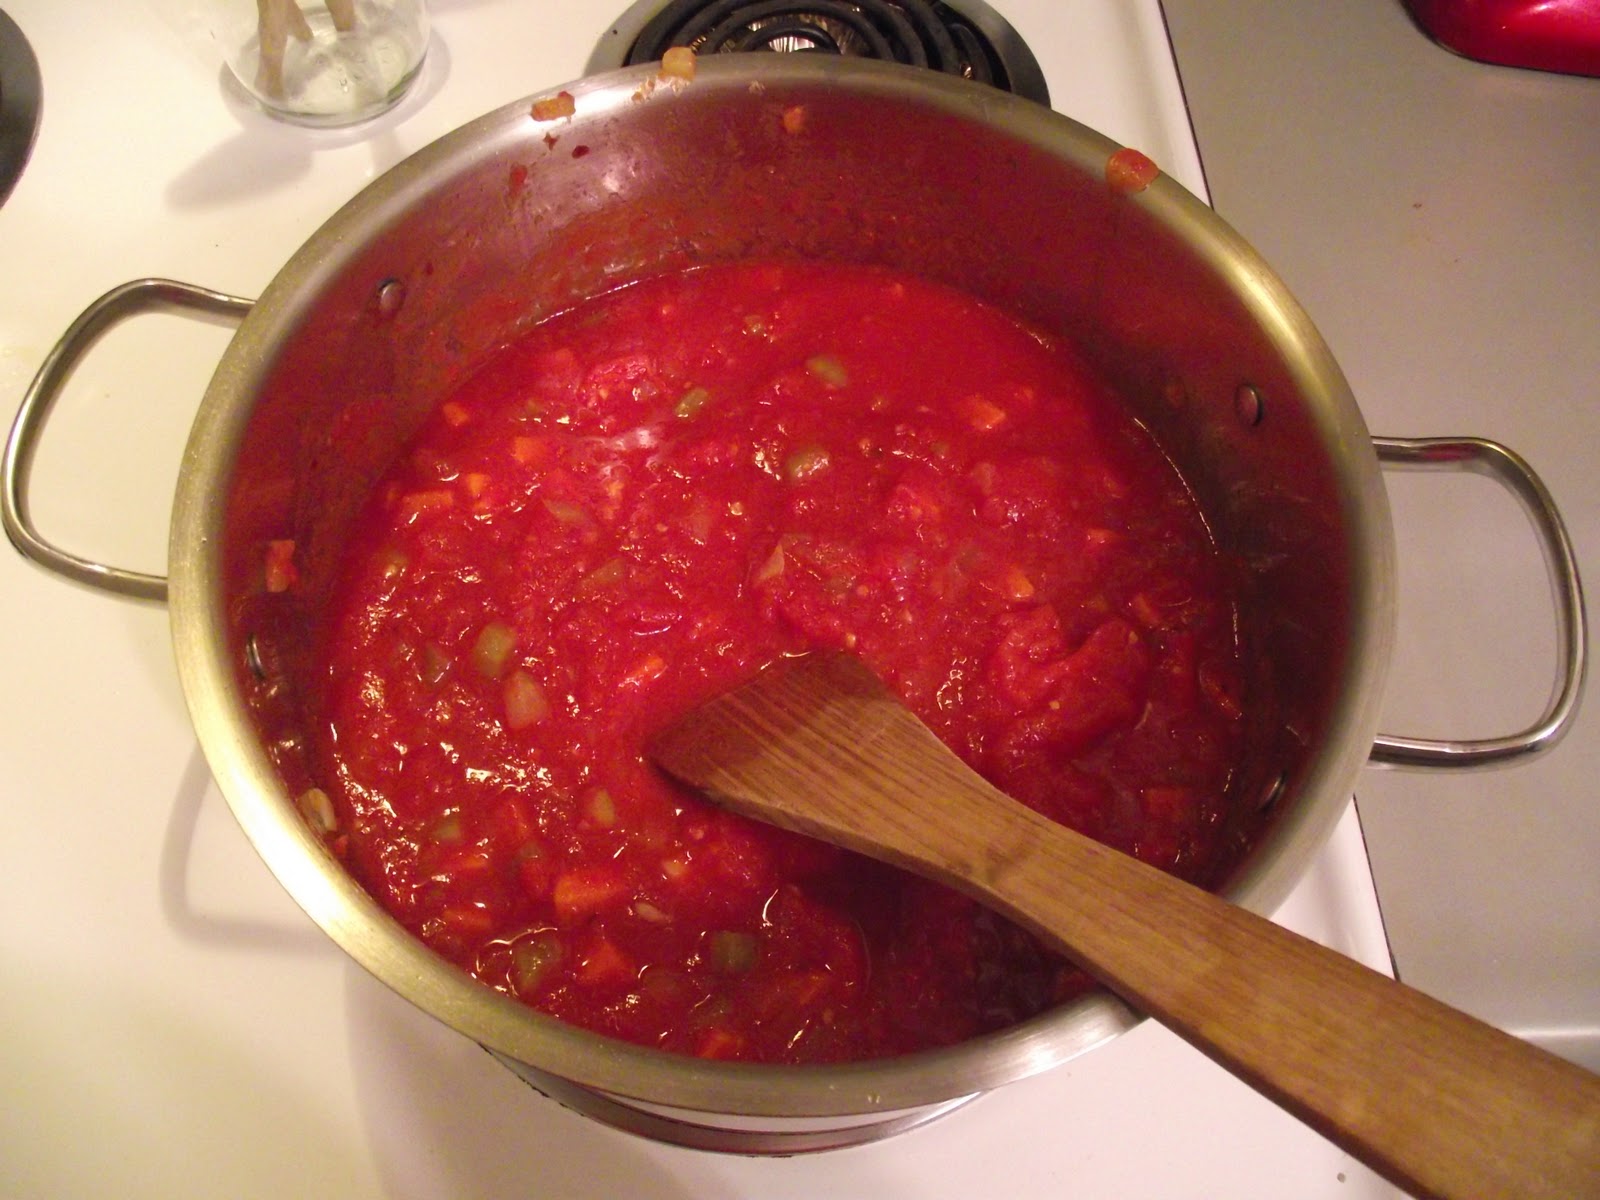
Tomato sauce is honestly and sincerely way easier to make than you think it is. Way easier. Also, the ingredient list is very short too. This is certainly something you can whip up right when you want it, no need to prepare it ahead of time. I just like to have a few cups on hand in the freezer.

Your Very Own Tomato Sauce
2 cans (28oz) of stewed, diced or crushed tomatoes (San Marzano are yummy, but whatevers cheapest works too)
2 stalks of celery, roughly chopped
1 large carrot, peeled and roughly chopped
1 medium onion, roughly chopped
2-3 cloves of garlic, roughly diced
2-3 tsp of honey (or more or less to taste)
2 tbsp olive oil
s&p to taste
chili flakes (optional)

1. Heat a dutch oven over medium heat, and add the oil and chili flakes.
2. Throw in your onions, and let them sweat for 3-5 minutes.
3. Add in the celery, carrots and garlic. Let this work for another 5-7 minutes.
4. Add in your tomatoes and mix everything up well. If you used stewed tomatoes, or diced tomatoes crush them against the side of the pot with your wooden spoon. Do not break your spoon like I did (RIP favourite wooden spoon, RIP).  Don't get bent out of shape if you can't get the consistency you want, you're going to buzz it in the blender after anyways.

Before.
5. Let all of this bubble for at least 5 minutes, or if you're preparing it ahead of time let it simmer as long as you have.
6. Once its done simmering, buzz it in the blender. 

After.

If you're eating it now, add any other herbs or spices you might want (oregano, or basil are nice). If you're squirreling it away, let it cool completely divide it up in to 2 cup portions and put it in the freezer.

This is the base to any number of recipes: spaghetti sauce, meatballs and sauce, chili, tomato soup, stew.

If you want to make lots, this recipe doubles well.

Happy Eating!

Erin

Sunday, September 19, 2010

Fall Dinner (and left overs) for Two: A Fall Stirfry

As evidenced by the cooler weather, and seemingly unending rain, fall is most definately upon us. I don't know about you, but I'm enjoying it. Its nice to get back in to a routine, after weekend upon weekend of activity that was the Summer this year.

Today, I've got a yummy fall weeknight dinner for you. It comes together in about half an hour, and its pretty friendly on your pocket book too.

Fall Stirfry
1 small onion, chopped
2 carrots, washed and sliced 
2 potatoes, washed and sliced (you can use sweet potatoes if you want, I’ve used one of each) 
2 apples, washed and chopped
2 ribs celery, washed and sliced
½ blub fennel, washed and sliced (If you've never eaten it before, you should, its delicious!)
1 package of dinner sausages (honey garlic, bratwurst or Oktoberfest work nicely – maple flavoured breakfast sausages would also be nice)
½ c. apple juice or apple cider
2 tbsp. cider vinegar
½ tsp. Rosemary
½ tsp. Thyme
½ tsp. Fennel Seed, crushed
1 inch knob of ginger, grated
2 cloves of garlic
Salt and Pepper to taste

In a large sauté pan, or electric frying pan, sauté the sausages over medium heat until they’re cooked through. Set them aside.


Have a look at your pan and decide if there are enough drippings to cook up your vegetables, or no. If not, add a bit of butter or canola oil. Then throw in your vegetables, and stir them around to make sure they all get a bit of drippings / butter / oil love. Add the rosemary, thyme, fennel seed, ginger and garlic at this time too. Let cook covered, for about 10 minutes, or until things start to get tender. In the meantime, slice up your sausages.


Once your vegetables are about ¾ of the way cooked, add your sausage back to the pan. Deglaze the pan with your vinegar (it will help lift all the brown bits from the bottom of the pan – the brown bits are the extra tasty parts, and you want them incorporated in the dish – really you do). This will steam a fair bit. Make sure you get your hand out of the way. Next, add in your apple juice and salt and pepper to taste. Cover the pan again, and cook for another 5-10 minutes.

It should be done now. Check the taste and add a bit more salt and pepper if necessary. This is delicious with some bread and butter.


This dinner will cost you between $7 and $10 depending on where you source your ingredients, and if you get them on sale like I did. For two people, that's between $3.50 and $5 a serving. This will probably feed 4 for dinner, at $10 for the meal, thats an average of $2.50 a person. Not too shabby if you ask me!

Leftovers are good for lunch. This is the type of dish that gets better as it sits as the ingredients soak up the juices.


Happy Eating!

Wednesday, September 8, 2010

Hunkering Down for Winter Part One - Meatball-o-rama!

It’s the last week of Summer. Well, maybe not officially, I guess fall doesn’t officially start until somewhere around the 20th, but we’re already September, and Labour Day is behind us , and for me that's the first loud signal of fall. I might be well past my school years, but I think I’m still running on that calendar. The past weekend was Labour Day weeknd, the last long weekend of Summer and while most people were escaping the city for one more day at the beach, or one more weekend at the cottage, we used the weekend to unpack the last of the boxes (urrrmmm, we moved last October...) and to start thinking about how we can use the long weekend to stock the freezer for the fall and winter months ahead. Some people may think I’m crazy but I really prefer the fall and winter, and I like to get ready for them by stocking my freezer so that I’m prepared for whatever may come.


On my list so far are meatballs, tomato sauce (not to be confused with spaghetti sauce), and chicken stock. I’ll make these over the next few weeks, and I’ll probably take another weekend later this fall and make Chili, Spaghetti Sauce and maybe stew. Today’s post is about meatballs.


As a kid, I hated hamburger. Just ask my mom - picture this, toddler Erin (who incidentally looks exactly like adult Erin, but just smaller), sitting in her highchair, eating spaghetti or maybe lasagna, but spitting out the crumbled hamburger...true story. Another true story - I didn’t willingly eat a hamburger until I was probably 17. It’s still not my favorite meat, but it is versatile, inexpensive, and when prepared well, it has the potential to be quite tasty. For most recipes calling for ground meat, I use ground turkey. I really prefer it, it makes meals lighter and easily takes on the flavour of whatever you’re cooking it in. However, meatballs are another story. Meatballs need beef.


Meatballs aren’t just for eating with spaghetti either. Although, meatballs and spaghetti is a delicious meal. At our house we use these little nuggets of yumminess as the basis for a number of meals: meatballs with Diana Sauce and fried rice, meatball casserole, meatballs and tomato sauce with garlic bread, meatball subs, etc. No need to worry, these recipes will make appearances over the winter.


So here it is, my recipe for:


Copious Amounts of Meatballs...
2/3 Club Pack of Lean Ground Beef (you can use the other 1/3 for a lasagna like I did), or two to three regular sized packages
2c. Breadcrumbs*
2 large Carrots
2 medium Onions
3 ribs of Celery
1/2 green pepper
4 Cloves Garlic
4 Eggs
1/2 shot glass Worcestershire sauce (I really used a shot glass)
1 tbsp honey mustard
1 tsp. black pepper
1 tsp. salt
1 tsp. chili flakes

*But Erin, I don’t have any bread crumbs, you say? Well - do you have bread? Yes? Then you can have bread crumbs in a few minutes. Take a few pieces of bread (doesn’t matter if its white, brown, multigrain or rye - all are good, but a stronger bread will alter the flavour of your dish a bit), the crustier, the better, and pop it in the oven at 250F for about 5 minutes, just to dry it out a bit. Tear it up, and buzz it in a food processor or blender until it is the consistency you want. For this recipe, you will want them very fine.

1. Buzz all of veg (carrots, onion, celery, green pepper, garlic) in a mini or regular sized food processor. If you don’t have one, you should get one, they’re very useful and will only run you about $25. If you don’t have either of those things, but you do have a blender I suppose you could try that. If all else fails, chop everything very, very finely.

Ingredients, all measured out in a super big bowl.
2. Preheat your oven to 375F.

3. Mix all ingredients together in a very large bowl. Use your hands. Its the only way to ensure that the ingredients get mixed all of the way through. If the meat mixture is overly crumbly (as in, you’re not sure if its going to hold together) then add another egg. If its too wet, add some more bread crumbs. Don’t over mix, this will make your meatballs tough. You just want your veg to be evenly distributed. I use lean hamburger, its lower in fat than medium, or regular, but still has enough fat in it that your meatballs won’t be dry. If you prefer a different type of hamburger, knock yourself out, you’ll just need to adjust your liquids (eggs) accordingly, and be prepared for either a drier, or greasier meatball.

2/3 of a club pack of ground beef - in case you were wondering what it looked like.
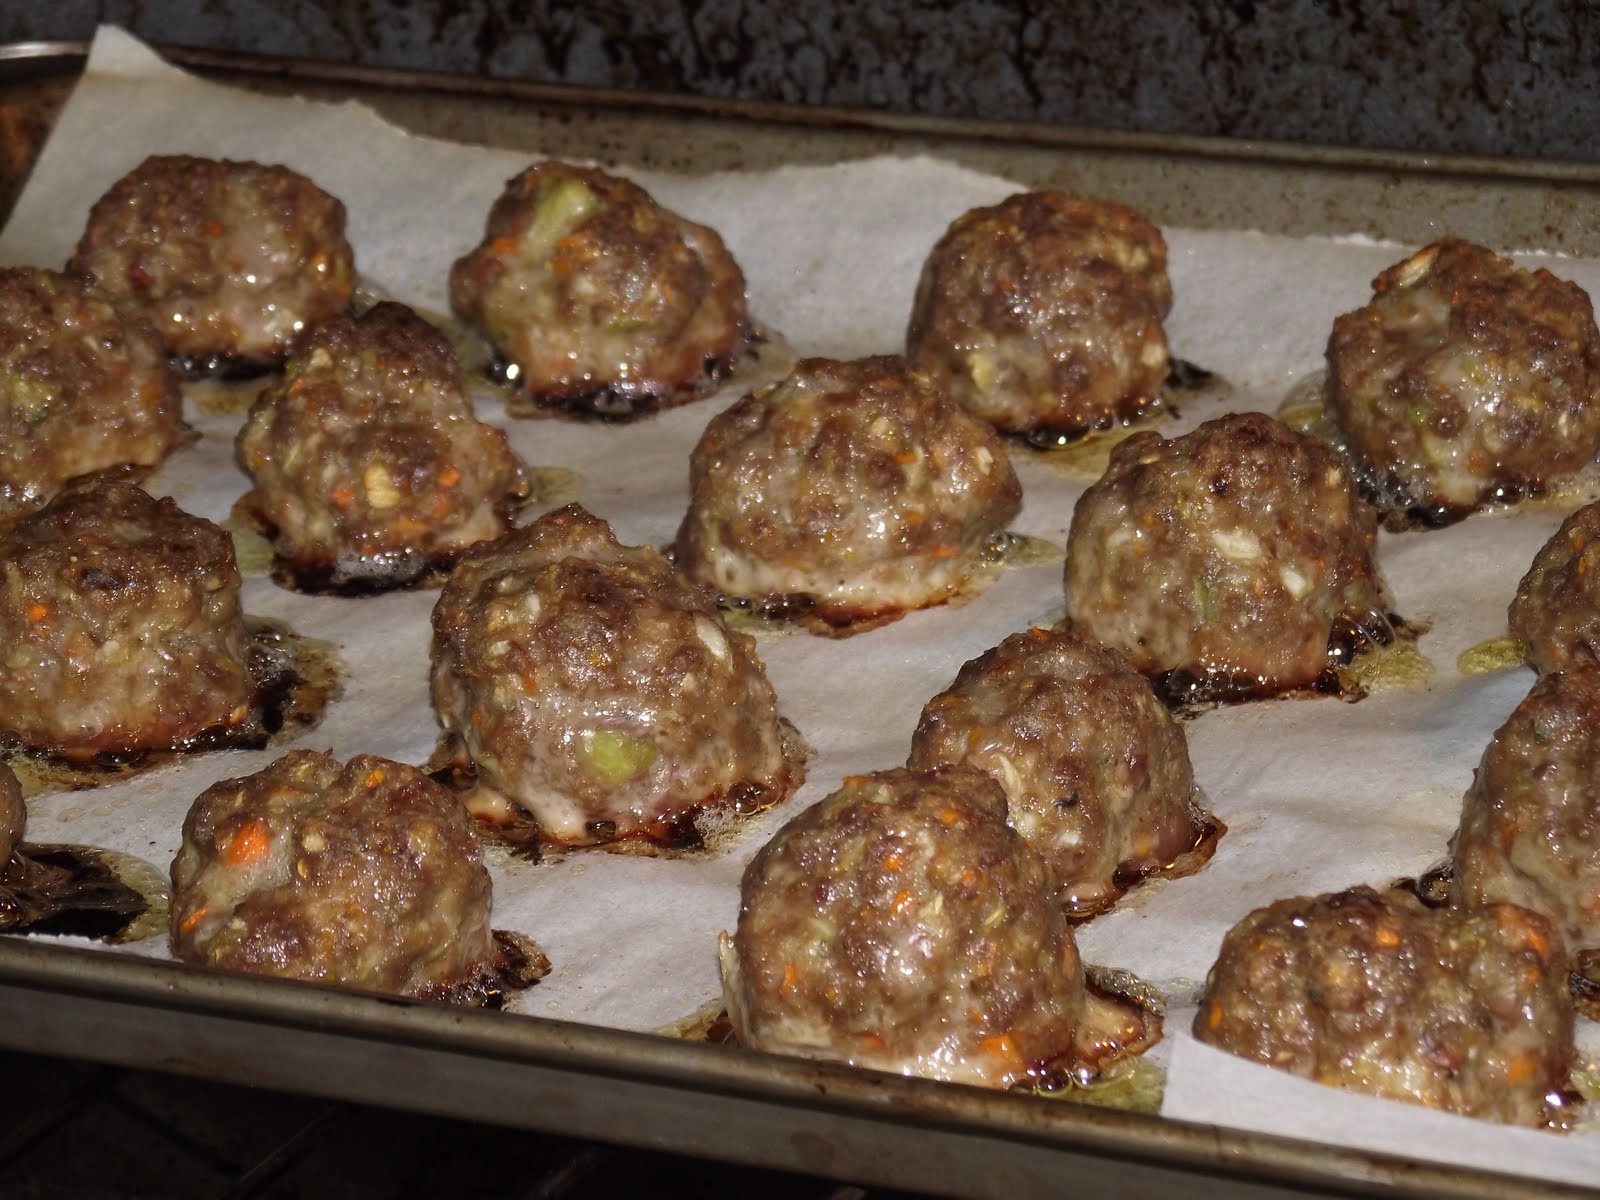
4. Line several baking sheets with parchment paper or tin foil. Parchment paper is better, as your food won’t stick to it. Leaving about a centimetre and a half between meatballs, roll them out and place them on the trays. I like to make mine about 2-3 cm around.

Meatballs ready for the oven.
5. Bake them, two trays at a time if you can for 20-30 minutes, until they’re cooked through (i.e. not pink on the inside anymore, you’ll have to sacrifice one...)


6. Set them aside to cool. Once they’re fully cooled, put them in a freezer bag and throw them in the deep freeze for a week night in the future, when you’re too tired to do anything but open up the bag of meatballs, and heat them in a sauce of some kind. Really, since you’ve already cooked them through, all you need to do is heat them up! It’s important to use a freezer bag, and not tupperwear, because they will become freezer burnt in the tupperwear!

On top of spaghetti, all covered in cheese!
I lost my poor meatball, when somebody sneezed!
Happy Eating!

Erin

Thursday, August 26, 2010

Broken Water Main and Out of Service Elevators = Take Out and Breakfast for Dinner

So, cooking at our home this week has been a bit put off by an incident which occured in our building early Monday morning.  At around 5:30am, we were startled awake by the fire alarm, which does not sound like a bell, but rather a pulsating, ear piercing noise. Once we realized it was indeed the fire alarm, and managed to get ourselves down the 12 flights of stairs and in to the rain, we were told that it wasn't a fire (it was really and truley a fire last time - ask 704 who had his patio furniture go up in flames), but that the water main leading in to the building had burst.


Better than the fire that happened on the 7th floor in April we thought, but on the way back in to the building one of the kind Firemen let us know that they'd be calling the city to turn the water off, and that they didn't know when it would be back on. As we all shuffled in to the elevators, we could hear the water pouring in to the basement...a great way to start a work week!


When we returned home, the elevators were out of service, and the water was still off. With no way to wash dishes, or even flush the toilet, take out and paper plates were our choice on Monday. The water was turned back on around 8:30pm Monday evening - thank God for plumbers! We've also realized that an emergency kit, including a few litres of water would be a good thing to have on hand. Here is a link to the list published by the Department of Public Safety of what should be in an emergency kit.


Tuesday, we found a lovely note on our door from building management indicating that extensive damage had been done to the elevators and that one of them might possibly be working again on the 30th...today is the 26th...large grocery shops are out of the question for the time being -  I'm not carrying heavy bags of groceries up 12 flights, and Jon has also vehemently indicated that he will not be doing this either - although, it should be noted that in December 2009, Jon did climb the 12 flights carrying a 15 pound turkey...


We had breakfast for dinner on Tuesday. It was sort of a bacon and egg tart if you will, a recipe which I adapted from the September 2010 issue of Everyday Food. (I will link to the recipe when it is available on line).

Bacon and Eggy Tarts
8 slices of bread
1/4 of slab bacon, sliced into lardons (or 6 pieces of regular bacon sliced into bite sized pieces)
6 eggs
butter to grease the muffin tins
salt and pepper to taste

1. Fry the bacon until golden, but not crispy. It will keep cooking in the oven later. Set aside.
2. Using a rolling pin, flatten your slices of bread slightly, and using a large water glass, cut out 8 rounds and slice in half.
3. Thoroughly grease 6 of the cups in a muffin tin and turn your oven on to 350F.
4. Use your half moons of bread to line the greased muffin tins. Usually, each will take two, but use the extra ones to fill in any gaps.
5. Distribute the bacon in each of the "tart shells" and crack an egg in to each.
6. Season with salt and pepper to taste and bake for 12-15 minutes, until the egg is just set. Don't over bake, or you'll get a weird film over top which is a bit rubbery, and not so good to eat. If this happens, just peel off that layer.

Sorry there are no pictures this time around, but really, it looked delicious, and it tasted delicious too. This recipe could be easily doubled, and would make a lovely brunch dish. It would probably also be good for kids, since it can be eaten sort of like a cupcake.

Dinner for the rest of the week will probably be similarly simple. We're cooking from the pantry until the elevators are fixed!

Here's hoping for a less eventful next week!

Erin

Thursday, August 19, 2010

Budget Wise Dinner for 2: Seasonal Pasta – Sausage and Zucchini Fettuccine

Late summer is delicious. The days are a little bit cooler, the evenings are fresh and beautiful and in Ontario, as around the country, the bounty of the harvest is pouring in to stores and markets everywhere and screams to be eaten.

Growing up, we always had a variety of fruits and vegetables on our table and in our fridge. My maternal grandparents owned and operated a fruit market, and my Mom worked there. Fruits and vegetables were the family business you could say, and this helped me learn at an early age the importance of buying fresh, local produce. It also means that I'm blessed with a well developed knowledge of which fruits and veggies are in season when, which not only helps me eat produce at its finest, but it also helps me save money too. Here is a link to a Foodland Ontario Chart which indicates what is in season when.

Mid-August is prime zucchini season. I know you've all heard about this miracle crop that seems to multiply like rabbits in your garden. It's a pretty versatile veggie; good on its own sautéed a little bit, but is also good shredded up in things like lasagna, as nutritious filler. Tonight it is one of the stars of a pasta dish I like to make in the summer, once the humidity has passed, and I'm starting to crave the comfort foods of fall again.
Zucchini - the miraculous multiplying vegetable!
Normally, I try and avoid leftovers like the plague. I don't enjoy eating the same thing, or a variation thereof, all week. However, pasta dishes are an exception. They are a delight the next day for lunch after the sauce has had a chance to soak in. MMMMM....my stomach is growling thinking about it now!

So, on to the recipe, which made a dinner for two, with leftovers, for only $8 (price breakdown below).

Sausage and Zucchini Fettuccine
1 package of Mild Italian Sausages, removed from casings, and crumbled (about 5 dinner sized links)
1/4 medium Sweet Onion, chopped
1 clove Garlic, minced
28 oz. tin of Crushed, Stewed or Diced tomatoes (I used crushed)
2 small Zucchini, green or yellow will work (I used both)
1 package of Fresh Fettucine, or 1/2 package of Dried Fettucine
S&P,to taste
Canola Oil,as needed
Honey or Sugar,as needed.

1. Heat a large frying pan to medium high and add the crumbled sausage. You may need to break this up further with a wooden spoon. Brown the sausage for about 5 minutes.

Kind of like sausage meatballs.
2. If the sausage hasn't released many drippings, add about a tbsp. of oil. Then add onions and garlic and sauté for 3-5 minutes.

3. Add the tin of tomatoes. If you’re using diced or stewed, break up with back of wooden spoon. Stir well and let simmer for 10-15 minutes, stirring occasionally.

Simmering dinner.
4. Add sliced zucchini and cook for an additional 8-10 minutes. Seasoning with salt and pepper to taste. If you find the sauce too acidic add a big squeeze of honey, or a tablespoon or two of sugar. Sounds weird, but trust me, it works.


Cook your pasta at this time too.

5. When your pasta is done, mix the whole mess together so that the pasta can absorb a bit of the sauce. Then serve with some parmesan cheese on top if you like.

Yummmm!

Price breakdown as follows:

Sausage $1.99 (on sale)
Zucchini $0.70 (on sale, and in season)
Onion $0.25 (whole onion $0.98)
Tin of Crushed Tomatoes $1.59
Fresh Pasta $3.49
S&P, Oil and Garlic Freebies (These are likely in your pantry)
_______________________________________________________
Total Cost $8.02

Note: If you have dried pasta on hand, use it and you’ll further reduce the cost of your meal to about $6.50.

Delicious, seasonal food, using local produce is possible on a budget – you just need to know when things are in season, and take advantage of sales when they happen.

Happy Eating!

Erin