Showing posts with label Saving $$. Show all posts

Monday, May 9, 2011

Cooking from your Pantry – Real Macaroni and Cheese


You’ve just gotten in the door from work, and you’re starving. You look in to your sad, empty refrigerator and realize you desperately need to pick up some groceries. But what’s that?  You have cheese, milk and butter?  Some flour and short pasta too?  Even a stale piece of bread to make bread crumbs?  Never fear and stop reaching for that take out menu! You have in your empty pantry the very ingredients you need to make a DELICIOUS dinner, one that you’ll find yourself craving, even when your fridge and pantry are full. You’re going to make yourself some delightful macaroni and cheese!

Now, not only are you saving money by using what you have in your kitchen and not ordering in; you’re also eating vegetarian, which in and of itself can also save you money as protein is usually the most expensive part of any meal. The best thing about this dish, for you carnivores out there, is that it is so rich and satisfying that you probably won’t even realize there isn’t any meat on your plate.

I think this is the first dish that I learned to make from scratch, when I was probably 11 or 12. Since then, I’ve made it so many times I no longer need to look at the recipe.  Its simple, its easy, its tasty, it makes wonderful leftovers, it freezes well, and its inexpensive to make. What more could you ask for in a recipe?

Macaroni and Cheese – from Scratch
3c. your choice of short pasta (macaroni, penne, fusili, gemeli, whatevery you have)
2c. grated cheddar cheese, or whatever you have in your fridge
2c. milk
3tbsp. margarine or butter
3tbsp. white, all purpose flour
½ c. bread crumbs (take that stale piece of bread and buzz it up in your food processor or blender) OPTIONAL

  • Preheat your oven to 400F.
  • Put a pot with lots of water on to boil to cook your pasta.
  • Once you’ve got your pasta in cooking heat a large sauce pan over medium heat. Add the butter, and melt it down being careful not to let it burn.
  • Once the butter is melted, whisk or stir in your flour until a paste forms. Let this cook for a minute or two. This is a roux, and will thicken your sauce.
  • Slowly whisk in the milk. Be sure to keep the sauce moving so the milk doesn’t burn. This should thicken up. If it doesn’t, add a little more flour.
  • Once the sauce has thickened a bit, add 2 c. of the grated cheese and stir until melted through. Remove from the heat.
  • When the pasta is done cooking, drain it and mix it in with the completed cheese sauce. Mix it well, you want it to get into all of the nooks and crannies of your pasta. Trust me.
  • Pour this into a 9x13” casserole and top with remaining cheese and bread crumbs if you wish.
  • Bake until sizzling, and cheese on top is melted. About 20 minutes.
  • This can easily be prepared ahead and stored in the fridge, or even frozen. Just wrap it up before you bake it, and once you're ready to have it add between 10-20 minutes of baking time.
Notes on Cheese Choice:
Use up whatever you have in your fridge. The taste will vary depending on what you use, but I find that my most successful Macaroni’s are often those for which I use a mix of odds and ends of cheese. The last one I made was with a mix of gouda, mozzarella and old cheddar and it was great! I would probably stay away from types like feta because they don’t melt well. If you only have a block of plain old cheddar, well that’s really good too.

Notes on Pasta:
My favourite pasta to use for this is fusili. There is something about the way the cheese sauce gets into all of the crevices of the pasta that I find really pleasing. Really, any short pasta will work. A short pasta is just that, a short cut pasta that often has a hole in it, or rough edges to catch sauce. These include macaroni elbows, penne, ziti, fusili, rotini, gemelli, cavatapi, etc. My mom usually uses traditional elbows. Use what you have or what you prefer. It doesn’t affect the taste. The only type I wouldn't use is shells, because they all stick together and I don't like them.

This is a tasty yet inexpensive way to feed a crowd.   Always buy your pasta on sale, whether you use whole wheat, or normal, watch the flyers and every other week or so, one or the other is on sale. This past week I picked up a package of macaroni for only $1.  Bricks of cheese also are often on sale, usually once or twice a month Kraft or Cracker Barrell will be on sale for $5.  You only use ½ a brick for a macaroni, and would only use about ½ the bag of macaroni. If you get these key items on sale, then a large pan of macaroni will only run you between $5 and $7 and it can easily feed about 6 people, or even 8 if you’re serving a salad too. Or, it will feed 2 for one dinner, and two to three week-day lunches.

Friday, February 18, 2011

Pennies Make Dollars: How to Save Some Moolah at the Grocery Store

Pennies make dollars. This phrase is indisputable. Pennies might seem insignificant, and not worth the bother, but in the end they add up to dollars and dollars are significant, especially when they’re saved.

I like to eat and cook. There’s no doubt about that, but that doesn’t mean I like to pay large grocery bills. In fact, I can think of a number of other things I’d rather spend my money on than groceries: my upcoming wedding, travel, home improvements, to name a few. The more I save on my groceries the more money I can can put towards those other things. With this in mind I try my best to get my groceries and stock my pantry for the best price possible. This doesn’t mean sacrificing quality meals, rather, it means taking some time to plan them out.

Here are my tips to save you some moolah:

Do Some Meal Planning
  • Sit down sometime during the week and plan out what you want to eat for meals (dinners and lunches) for the following week. Make a list of the things you’ll need to pick up.
  • I usually plan for 5 meals, with two nights for either takeout of leftovers. You don’t need to assign days,  but I find having a list of things on the fridge of options that you know you have all of the ingredients to make really makes it easy to avoid the “What’s for Dinner?” struggle after a long day at work.  I also like to plan to make one larger dish, like a pasta, or soup, to take for lunches during the week. I usually make this on Sunday.
Cook From Scratch: Shop the Fresh Section of the Store
  • Try and buy most of your groceries from the produce and meat counter, usually the outside aisles of the grocery store.
  • Fresh meats and veggies, although they may seem more expensive, are a less expensive way to stock your kitchen then buying pre-packaged, pre-made items.
  • Not only will this save you some money, it will also help you eat more healthfully as well. Even if packaged products say they’re the healthy choice, they still contain way more salt than anything you would ever make yourself, not to mention the other unpronounceable ingredients they also likely include.
Shop the Flyers
  • When you’re doing your meal planning for the week ahead check out the flyers and plan your meals around what’s on sale and what you have in the pantry.
  • Don't get flyers delivered to your home?  Check out the store's website. They ususally post the weeks flyer there.
Shop with a List
  • Keep a running grocery list on your fridge. Add to it when you notice you’re out of things.
  • Shop only for the things on your list. Sticking to it will save you money you might spend on impulse buys.
Use Coupons
  • Coupons = free money! Use them! If a company wants to give you some money, just for buying something you need anyway, who are you to say no? Keep your eyes peeled and clip, tear or order them when you can.
  • Some sites I like to visit are: websaver.ca , save.ca , gocoupons.ca , and brandsaver.ca . Sometimes you need to create an account and order the coupons, but its worth the effort in the savings you get.
  • Next time you’re at your grocery store check out the area by the entrance. Some grocery stores have an in-store coupon rack. Have a peek each time you’re there, they change frequently.
  • If you’re looking for something in particular, you can check out the manufacturers website. They sometimes have coupons you can print.
Stock Up on Staples When Things are on Sale
  • When the things you use all of the time are on sale, buy some. Staples always go on sale, so why ever pay full price.
  • Some items to keep an eye out for:  tooth paste, toilet paper, tissues, soap, dish soap, pantry items (soup, crushed tomatoes, pasta, flour, sugar, etc.)
Compare Store Brands to Name Brands
  • Compare the store brands to name brands they’re often the same quality, in some cases the exact same product for a good deal less money.
  • Case in point, we used to feed our cats the premium name brand kibble, until I compared the ingredient list with that of the store brand. The ingredient list and nutritional information are identical, but the store brand is $10 less a bag. A name alone isn’t enough to convince me to pay $10 more a bag. 
Buy in Season When You Can
  • When produce is in season there is a lot more of it available which makes the price decrease. It also tastes better. Try and use produce in season, not only will it taste better, it will save you some pennies too.
  • I like to buy large quantities of berries when they’re in season and freeze them so that I can use them over the winter.
Buy in Bulk, Don’t Buy Serving Sized Packages
  • Stay away from serving sized packages, you’ll pay more for a smaller amount of the product than you would if you bought a larger package and served it out yourself.
  • For example: Buy the large container of quick oats for your morning oatmeal, you’ll find that you get between 3 and 4 times the number of individual servings you would if you bought the individual packages and at a fraction of the cost.
  • Check the price per unit; this is usually in small print on the price sticker on the racks in stores. The larger box is sometimes cheaper per unit. Paying a little bit more for a larger package is sometimes works out to better value for your money.
Happy Saving!

Wednesday, January 26, 2011

Chicken Soup for the Cold (both the temperature and the illness...)

It’s Wednesday, and we’re halfway through the work week. While it’s a mere -10C in our nations capital today, it was a bone chilling -38C (including the ever-present wind-chill) on Monday morning when I left the house for work. Between Monday and now, I’ve managed to pick up a cold. This is just one in an endless number of minor illnesses from this cold and flu season, and I’m tired of it.  There is only one answer:

Cold Temperature + Cold the illness = One need for Chicken Soup

So, taking the advice of my Mom (eat more garlic), and my Aunt Karen (eat chicken soup) to heart, I whipped up a batch of Chicken  soup last night.  This recipe contains a rediculous amount of ginger and garlic, but that’s because I’m hoping to scare this cold away. If you’re healthy, feel free to tone down the garlic and ginger.

Chicken Rice Soup
1 boneless, skinless chicken breast
2 carrots (one washed and cut in to 1” pieces, one peeled and sliced)
2 ribs of celery (one washed and cut into 1” pieces, one washed and sliced)
2 small onions (one quartered, one diced)
2 inch piece of ginger (cut into 8 pieces)
6 cloves of garlic (3 cut in half, 3 diced)
2 bay leaves
¼ tsp. red chilli flakes
1 tbsp. soy sauce
6 cups of water
1 c. rice (I used a combination of wild rice, white rice and brown rice)

First you make a broth:
  • In a large sauce pot put 3c. of water, the 1” pieces of carrot and celery, the ginger, the halved cloves of garlic, the bay leaves, the chilli flakes, the soy sauce and the chicken on to boil. This will both poach the chicken for the soup, and create a yummy broth. Leave this to simmer until the chicken is cooked through, between 20 and 30 minutes for a thawed piece of chicken, and 30-40 minutes for a frozen piece of chicken.
  • When the chicken is cooked (use a meat thermometer to check, it should read 180F), set it aside to cool and strain the vegetables, bay leaves, ginger and garlic from the broth.
Interesting Food Trivia:  Sometimes the terms stock and broth are used interchangeably. However, there is a difference between the two. Stock, is made using bones, like when you roast and boil the turkey carcass after Christmas to make turkey soup. Broth is made by poaching a meat, in this case chicken, to create soup.

To make the soup:
  • Add the remaining 3 cups of water to the broth and heat to a boil. Throw in your sliced and diced veggies, and the remaining garlic. Add in your rice, and the stock puck as well. Turn the heat down, and let simmer for 20-30 minutes.
  • Meanwhile, tear your chicken into bite sized pieces.
  • Add the chicken in the last 5 minutes of cooking.
This recipe makes enough for about 5 medium bowls of soup. Hopefully it doesn’t take that many to make my cold go away, but if it does, at least it tastes better than cough syrup!

Tuesday, January 4, 2011

Happy New Year! A new year, and a new start!

Happy New Year everyone!  Here we are 4 days in, and its shaping up to be a good year.

I'm taking advantage of this time of the year to press the reset button on my blog. I apologize for the long absence, but this fall flew by, and was side tracked with the sinus infection that wouldn't end, and my dad (my most dedicated reader) had a heart attack which, no need to say, occupied my mind and thoughts for some time.  The sinus infection is gone, and I'm happy to say that after 9 weeks of rest and relaxation my Dad is back to work today, much healthier than he was before.

His heart attack was a wake-up call for my family that we need to be taking better care of ourselves. Healthy food is a great place to start.  With that in mind, and with an end to holiday leftovers in sight, I'm back to cooking from scratch in my kitchen.

Here's a quick recipe for a hearty soup, great to whip up on a Sunday to have for lunch all week. Sorry no pictures this time, but rest assured its a lovely orangy colour and is delcious to boot!

A note on lentils:  There are many types of lentils, I've chosen red because I think they're pretty. This soup would work equally well with other types.  Lentils are well priced (a bag of dried lentils, enough for many pots of soup, will run you maybe $3), high fibre and very filling. They're a great way to round out a meal or a soup.

Curried Red Lentil Soup
1 large carrot, peeled and chopped
1 celery stalk, peeled and chopped
1 medium onion, chopped
2 inch piece of ginger, peeled and finely chopped
1c. red lentils, rinsed and sorted**
4c. water
1 tsp. each cinnamon, cumin, curry powder
1 bay leaf
3/4 c. crushed tomatoes or  leftover marinara sauce
Canola oil (or whatever mild tasting oil you might have)
Low Fat Greek Yogourt
Lime, cut in to wedges

**make sure you rinse them to get the dust off, and have a peek through to make sure there are no stones or miscoloured lentils)

1. Saute in a large pot, the carrot, onion, celery and ginger until softened, about 5 minutes.
2. Add in spices, and bay leaf. Saute an additional 2-3 minutes.
3. Add in tomatoes, lentils and water. Mix well.
4. Simmer for 45-50 minutes. This will look more like a stew than a soup.
5. Serve with a dolop of greek yogourt and a squeeze of lime.

There you go, a heart healthy, delicious recipe, ready to fill your lunch bag in just under an hour!

Monday, September 27, 2010

Hunkering Down for Winter Part 2: Your Very Own Tomato Sauce

Ok, so since it never stops raining in Ottawa these days, and since there's no denying that its officially Fall (check the calendar and then come and find me - we'll pout together) it's time for another installment of Hunkering Down for Winter.

So my man-friend was away this past weekend which left me with wondering what to do with all of my newly discovered free time. Of course, I turned to my good friend the kitchen.

Tomato sauce is honestly and sincerely way easier to make than you think it is. Way easier. Also, the ingredient list is very short too. This is certainly something you can whip up right when you want it, no need to prepare it ahead of time. I just like to have a few cups on hand in the freezer.

Your Very Own Tomato Sauce
2 cans (28oz) of stewed, diced or crushed tomatoes (San Marzano are yummy, but whatevers cheapest works too)
2 stalks of celery, roughly chopped
1 large carrot, peeled and roughly chopped
1 medium onion, roughly chopped
2-3 cloves of garlic, roughly diced
2-3 tsp of honey (or more or less to taste)
2 tbsp olive oil
s&p to taste
chili flakes (optional)

1. Heat a dutch oven over medium heat, and add the oil and chili flakes.
2. Throw in your onions, and let them sweat for 3-5 minutes.
3. Add in the celery, carrots and garlic. Let this work for another 5-7 minutes.
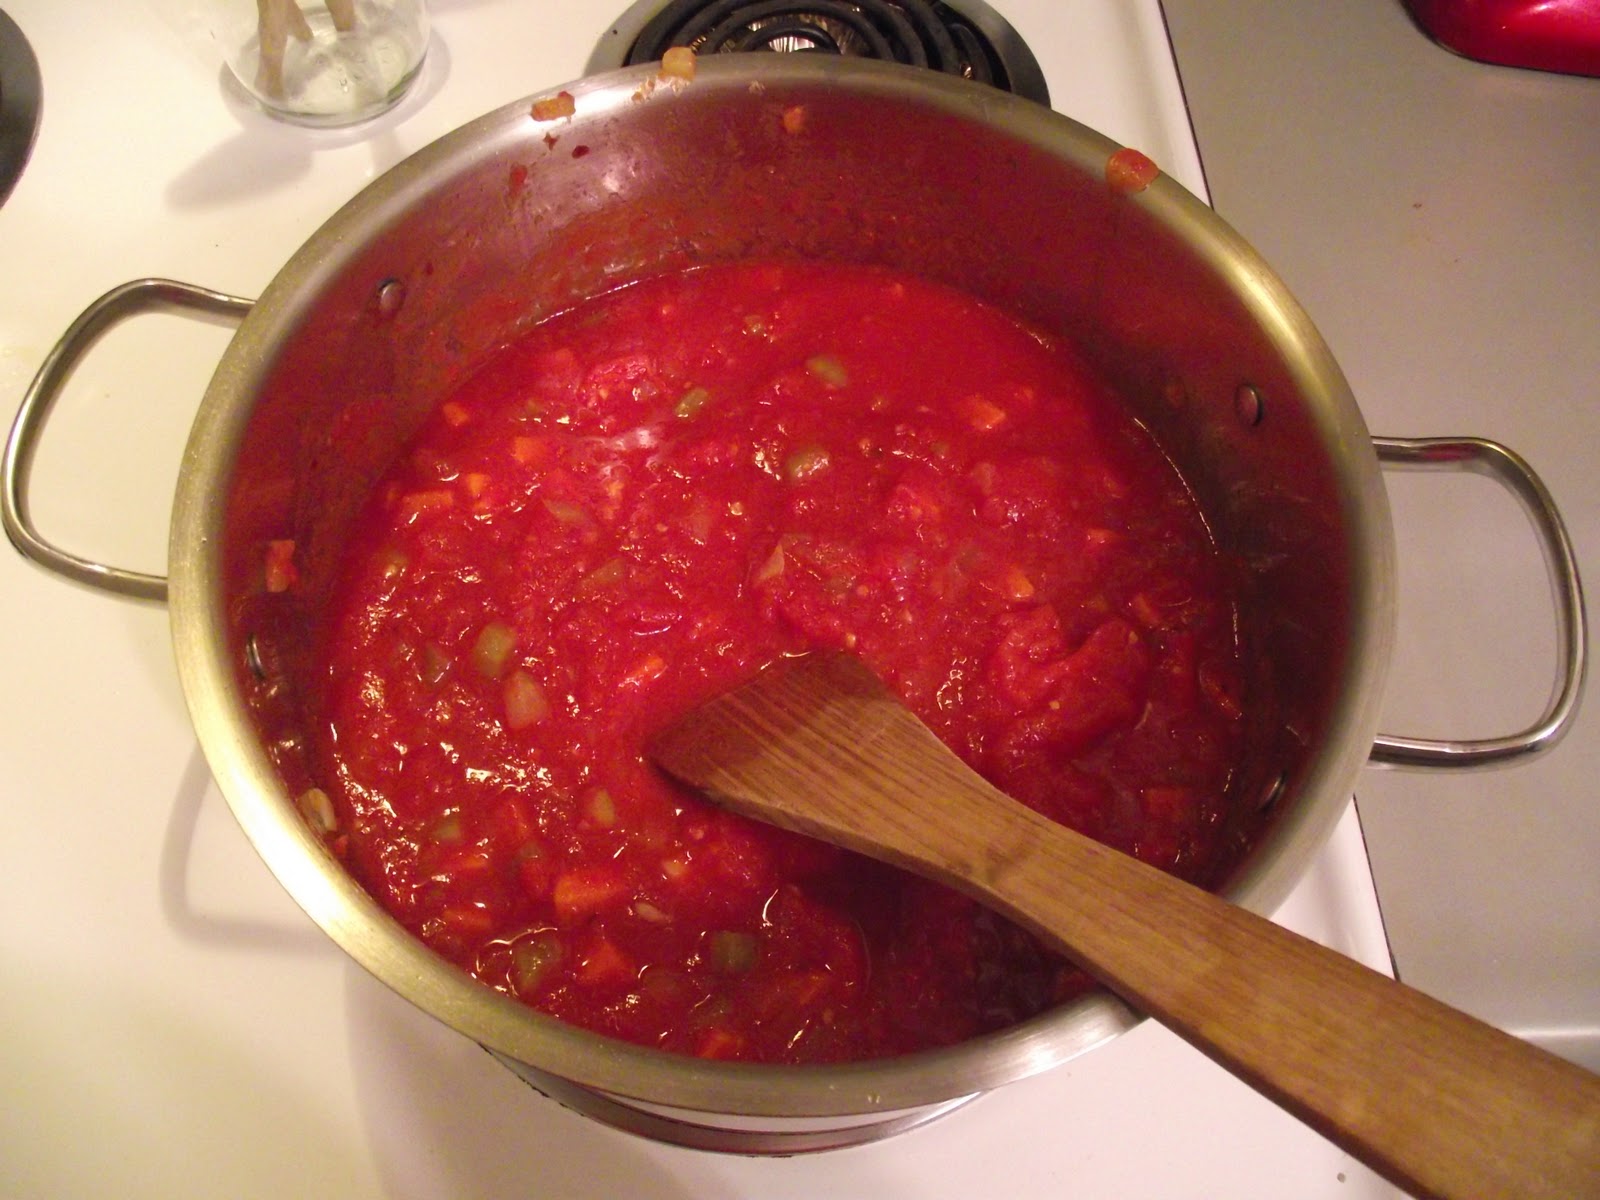
4. Add in your tomatoes and mix everything up well. If you used stewed tomatoes, or diced tomatoes crush them against the side of the pot with your wooden spoon. Do not break your spoon like I did (RIP favourite wooden spoon, RIP).  Don't get bent out of shape if you can't get the consistency you want, you're going to buzz it in the blender after anyways.

Before.
5. Let all of this bubble for at least 5 minutes, or if you're preparing it ahead of time let it simmer as long as you have.
6. Once its done simmering, buzz it in the blender. 

After.

If you're eating it now, add any other herbs or spices you might want (oregano, or basil are nice). If you're squirreling it away, let it cool completely divide it up in to 2 cup portions and put it in the freezer.

This is the base to any number of recipes: spaghetti sauce, meatballs and sauce, chili, tomato soup, stew.

If you want to make lots, this recipe doubles well.

Happy Eating!

Erin

Wednesday, September 8, 2010

Hunkering Down for Winter Part One - Meatball-o-rama!

It’s the last week of Summer. Well, maybe not officially, I guess fall doesn’t officially start until somewhere around the 20th, but we’re already September, and Labour Day is behind us , and for me that's the first loud signal of fall. I might be well past my school years, but I think I’m still running on that calendar. The past weekend was Labour Day weeknd, the last long weekend of Summer and while most people were escaping the city for one more day at the beach, or one more weekend at the cottage, we used the weekend to unpack the last of the boxes (urrrmmm, we moved last October...) and to start thinking about how we can use the long weekend to stock the freezer for the fall and winter months ahead. Some people may think I’m crazy but I really prefer the fall and winter, and I like to get ready for them by stocking my freezer so that I’m prepared for whatever may come.


On my list so far are meatballs, tomato sauce (not to be confused with spaghetti sauce), and chicken stock. I’ll make these over the next few weeks, and I’ll probably take another weekend later this fall and make Chili, Spaghetti Sauce and maybe stew. Today’s post is about meatballs.


As a kid, I hated hamburger. Just ask my mom - picture this, toddler Erin (who incidentally looks exactly like adult Erin, but just smaller), sitting in her highchair, eating spaghetti or maybe lasagna, but spitting out the crumbled hamburger...true story. Another true story - I didn’t willingly eat a hamburger until I was probably 17. It’s still not my favorite meat, but it is versatile, inexpensive, and when prepared well, it has the potential to be quite tasty. For most recipes calling for ground meat, I use ground turkey. I really prefer it, it makes meals lighter and easily takes on the flavour of whatever you’re cooking it in. However, meatballs are another story. Meatballs need beef.


Meatballs aren’t just for eating with spaghetti either. Although, meatballs and spaghetti is a delicious meal. At our house we use these little nuggets of yumminess as the basis for a number of meals: meatballs with Diana Sauce and fried rice, meatball casserole, meatballs and tomato sauce with garlic bread, meatball subs, etc. No need to worry, these recipes will make appearances over the winter.


So here it is, my recipe for:


Copious Amounts of Meatballs...
2/3 Club Pack of Lean Ground Beef (you can use the other 1/3 for a lasagna like I did), or two to three regular sized packages
2c. Breadcrumbs*
2 large Carrots
2 medium Onions
3 ribs of Celery
1/2 green pepper
4 Cloves Garlic
4 Eggs
1/2 shot glass Worcestershire sauce (I really used a shot glass)
1 tbsp honey mustard
1 tsp. black pepper
1 tsp. salt
1 tsp. chili flakes

*But Erin, I don’t have any bread crumbs, you say? Well - do you have bread? Yes? Then you can have bread crumbs in a few minutes. Take a few pieces of bread (doesn’t matter if its white, brown, multigrain or rye - all are good, but a stronger bread will alter the flavour of your dish a bit), the crustier, the better, and pop it in the oven at 250F for about 5 minutes, just to dry it out a bit. Tear it up, and buzz it in a food processor or blender until it is the consistency you want. For this recipe, you will want them very fine.

1. Buzz all of veg (carrots, onion, celery, green pepper, garlic) in a mini or regular sized food processor. If you don’t have one, you should get one, they’re very useful and will only run you about $25. If you don’t have either of those things, but you do have a blender I suppose you could try that. If all else fails, chop everything very, very finely.

Ingredients, all measured out in a super big bowl.
2. Preheat your oven to 375F.

3. Mix all ingredients together in a very large bowl. Use your hands. Its the only way to ensure that the ingredients get mixed all of the way through. If the meat mixture is overly crumbly (as in, you’re not sure if its going to hold together) then add another egg. If its too wet, add some more bread crumbs. Don’t over mix, this will make your meatballs tough. You just want your veg to be evenly distributed. I use lean hamburger, its lower in fat than medium, or regular, but still has enough fat in it that your meatballs won’t be dry. If you prefer a different type of hamburger, knock yourself out, you’ll just need to adjust your liquids (eggs) accordingly, and be prepared for either a drier, or greasier meatball.

2/3 of a club pack of ground beef - in case you were wondering what it looked like.
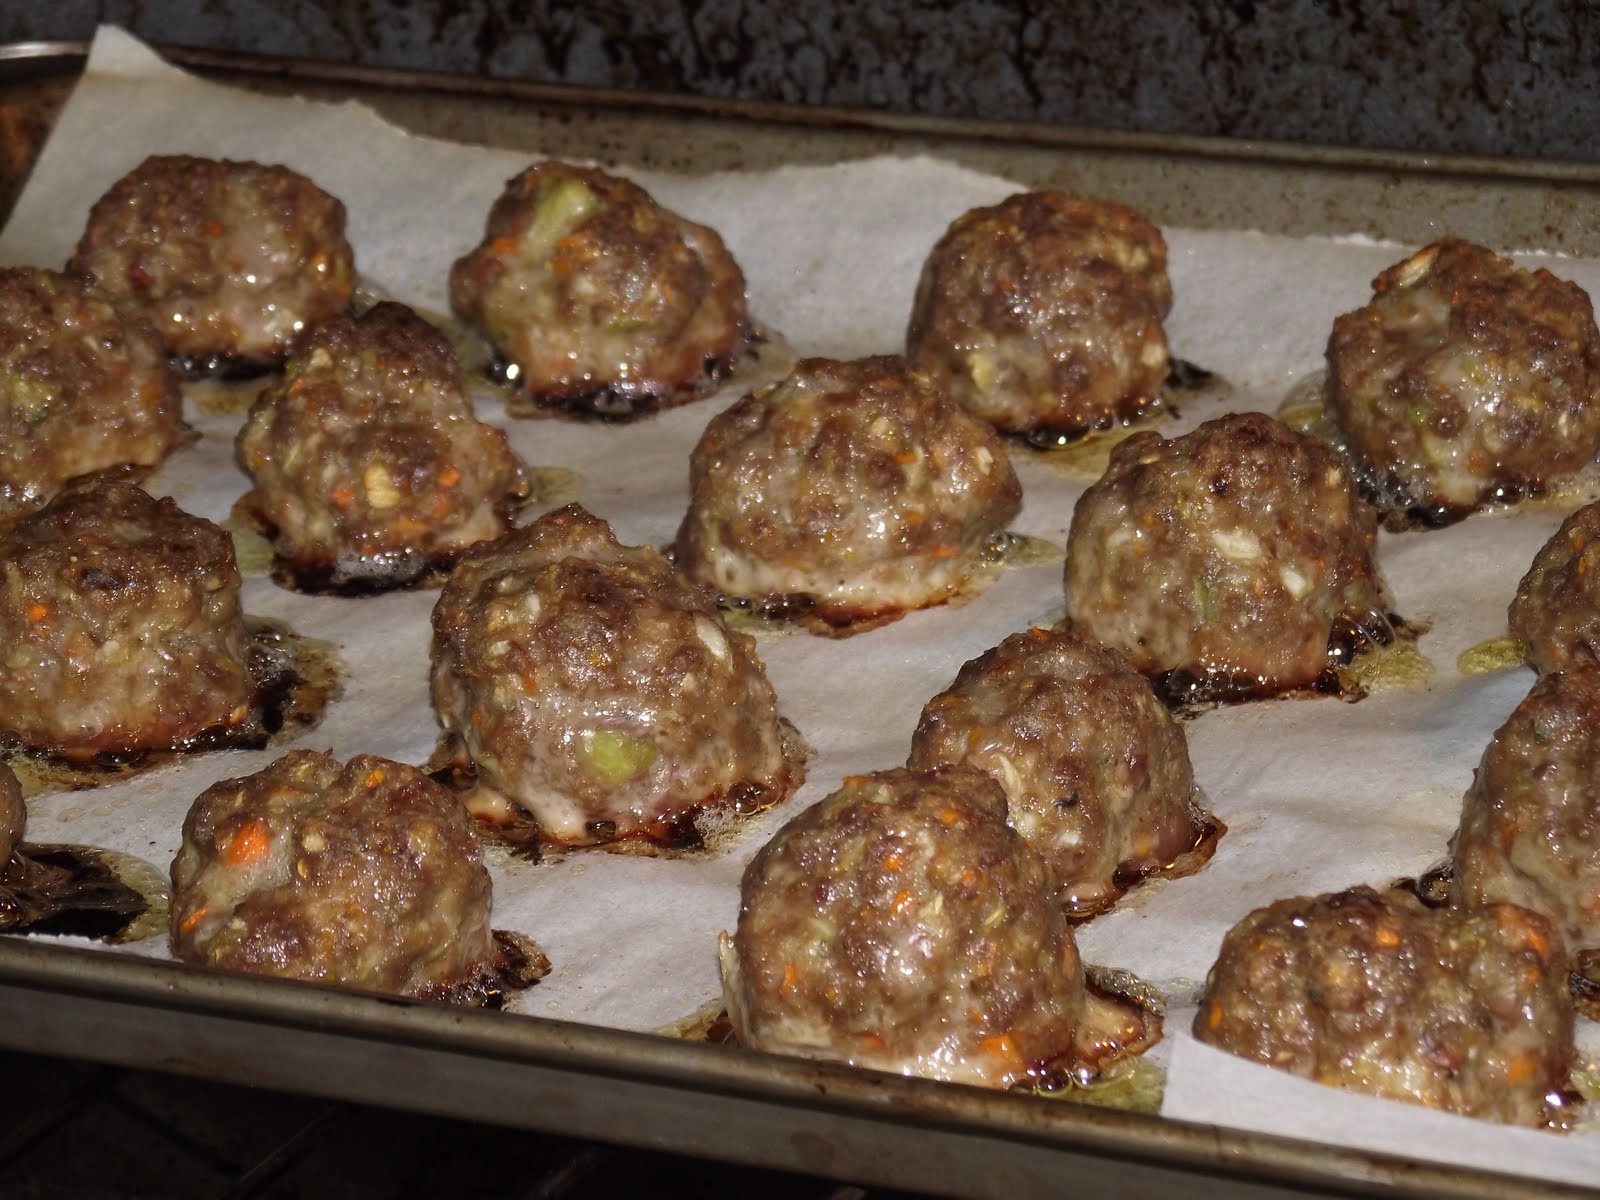
4. Line several baking sheets with parchment paper or tin foil. Parchment paper is better, as your food won’t stick to it. Leaving about a centimetre and a half between meatballs, roll them out and place them on the trays. I like to make mine about 2-3 cm around.

Meatballs ready for the oven.
5. Bake them, two trays at a time if you can for 20-30 minutes, until they’re cooked through (i.e. not pink on the inside anymore, you’ll have to sacrifice one...)


6. Set them aside to cool. Once they’re fully cooled, put them in a freezer bag and throw them in the deep freeze for a week night in the future, when you’re too tired to do anything but open up the bag of meatballs, and heat them in a sauce of some kind. Really, since you’ve already cooked them through, all you need to do is heat them up! It’s important to use a freezer bag, and not tupperwear, because they will become freezer burnt in the tupperwear!

On top of spaghetti, all covered in cheese!
I lost my poor meatball, when somebody sneezed!
Happy Eating!

Erin

Wednesday, August 11, 2010

Confession #2 - I keep an inventory of my freezer...

Really, I do. Those of you who know me are shaking your heads right now, because I’m sure this revelation isn’t really that surprising to you. Now, I should clarify. I don't just mean the over the fridge freezer (although I inventory this too), I mean our mini deep freeze.

Our trusty deep freeze. One of the best birthday presents ever. Serious.
Deep Freezes can turn in to an abyss. There are times when you just don't know what you're going to find in the deep, dark corners. But freezers can play an important role in keeping your grocery bills low. An initial investment of a couple hundred dollars can help you save hundreds over the long run.


If you have a freezer, don’t just use it to hold your frozen pizzas and hard liquor (although, you’ll find both in my freezers), use it to store perishables you’ve picked up on sale. By buying multiples of items you regularly use when they’re on sale you save a lot of pennies which can be used for other things. You can also buy larger quantities of produce when it is in season, and more reasonably priced, and store it in the freezer for out of season use.

Blueberries and Cranberries - washed and frozen, ready to be used.
Case in point, during the cooler months of the year we often enjoy a roasted chicken on the weekend. When they're not on sale, a whole chicken, can run you between $10 and $15. However, about once a month or so, they go on sale at our grocery store for $5 a piece. So, I buy two or three and put them away. Over the course of a year, this saves us about $100. For us, this wouldn’t be possible without a deep freeze. However, if an over the fridge freezer is all you have, keep it organized, and you'll be surprised at what you can get in it.

It might not look organized, but it is! :o)
So, you’ve used this strategy, and you have a fully loaded, packed to the brim freezer. But now you can't remember what's at the bottom. You can only remember the most recent thing you put in... dundudadaaaaaaaaaa! FREEZER INVENTORY TO THE RESCUE! (Picture an 8*10 sheet of paper with a list on it, wearing a red and black cape and mask here)


We try to make a note of what goes in and out of the freezer, and how much of each item remains. This way, when we're trying to plan out our meals for the week, or our groceries, or even just our next meal, we can just have a peek at the list, and go from there, rather than digging through the deep freeze unnecessarily and forgetting to put something back in. (This happens, ask me why on at 8am one Saturday morning last fall I roasted two large roasts of beef, only to put them back in the freezer…)

The Inventory. A little worse for the wear, but still very useful.
Taking a few minutes to make an inventory also gives you an opportunity to pitch those unidentifiable objects, and to make note of things you didn’t know you had. Keep your inventory however you like. Maybe you only need a list of things that are in there. I like to divide mine in to four sections: Meats, Fruits and Veggies, Prepared Foods and Bread. Probably unnecessary, but that’s how I like it. Keep it somewhere visible, like posted on the fridge or a bulletin board, and refer to it when you need to.

From my computer, where I’m thinking about what to make for dinner, to yours: Happy Inventorying!