Wednesday, January 26, 2011

Chicken Soup for the Cold (both the temperature and the illness...)

It’s Wednesday, and we’re halfway through the work week. While it’s a mere -10C in our nations capital today, it was a bone chilling -38C (including the ever-present wind-chill) on Monday morning when I left the house for work. Between Monday and now, I’ve managed to pick up a cold. This is just one in an endless number of minor illnesses from this cold and flu season, and I’m tired of it.  There is only one answer:

Cold Temperature + Cold the illness = One need for Chicken Soup

So, taking the advice of my Mom (eat more garlic), and my Aunt Karen (eat chicken soup) to heart, I whipped up a batch of Chicken  soup last night.  This recipe contains a rediculous amount of ginger and garlic, but that’s because I’m hoping to scare this cold away. If you’re healthy, feel free to tone down the garlic and ginger.

Chicken Rice Soup
1 boneless, skinless chicken breast
2 carrots (one washed and cut in to 1” pieces, one peeled and sliced)
2 ribs of celery (one washed and cut into 1” pieces, one washed and sliced)
2 small onions (one quartered, one diced)
2 inch piece of ginger (cut into 8 pieces)
6 cloves of garlic (3 cut in half, 3 diced)
2 bay leaves
¼ tsp. red chilli flakes
1 tbsp. soy sauce
6 cups of water
1 c. rice (I used a combination of wild rice, white rice and brown rice)

First you make a broth:
  • In a large sauce pot put 3c. of water, the 1” pieces of carrot and celery, the ginger, the halved cloves of garlic, the bay leaves, the chilli flakes, the soy sauce and the chicken on to boil. This will both poach the chicken for the soup, and create a yummy broth. Leave this to simmer until the chicken is cooked through, between 20 and 30 minutes for a thawed piece of chicken, and 30-40 minutes for a frozen piece of chicken.
  • When the chicken is cooked (use a meat thermometer to check, it should read 180F), set it aside to cool and strain the vegetables, bay leaves, ginger and garlic from the broth.
Interesting Food Trivia:  Sometimes the terms stock and broth are used interchangeably. However, there is a difference between the two. Stock, is made using bones, like when you roast and boil the turkey carcass after Christmas to make turkey soup. Broth is made by poaching a meat, in this case chicken, to create soup.

To make the soup:
  • Add the remaining 3 cups of water to the broth and heat to a boil. Throw in your sliced and diced veggies, and the remaining garlic. Add in your rice, and the stock puck as well. Turn the heat down, and let simmer for 20-30 minutes.
  • Meanwhile, tear your chicken into bite sized pieces.
  • Add the chicken in the last 5 minutes of cooking.
This recipe makes enough for about 5 medium bowls of soup. Hopefully it doesn’t take that many to make my cold go away, but if it does, at least it tastes better than cough syrup!

Wednesday, January 12, 2011

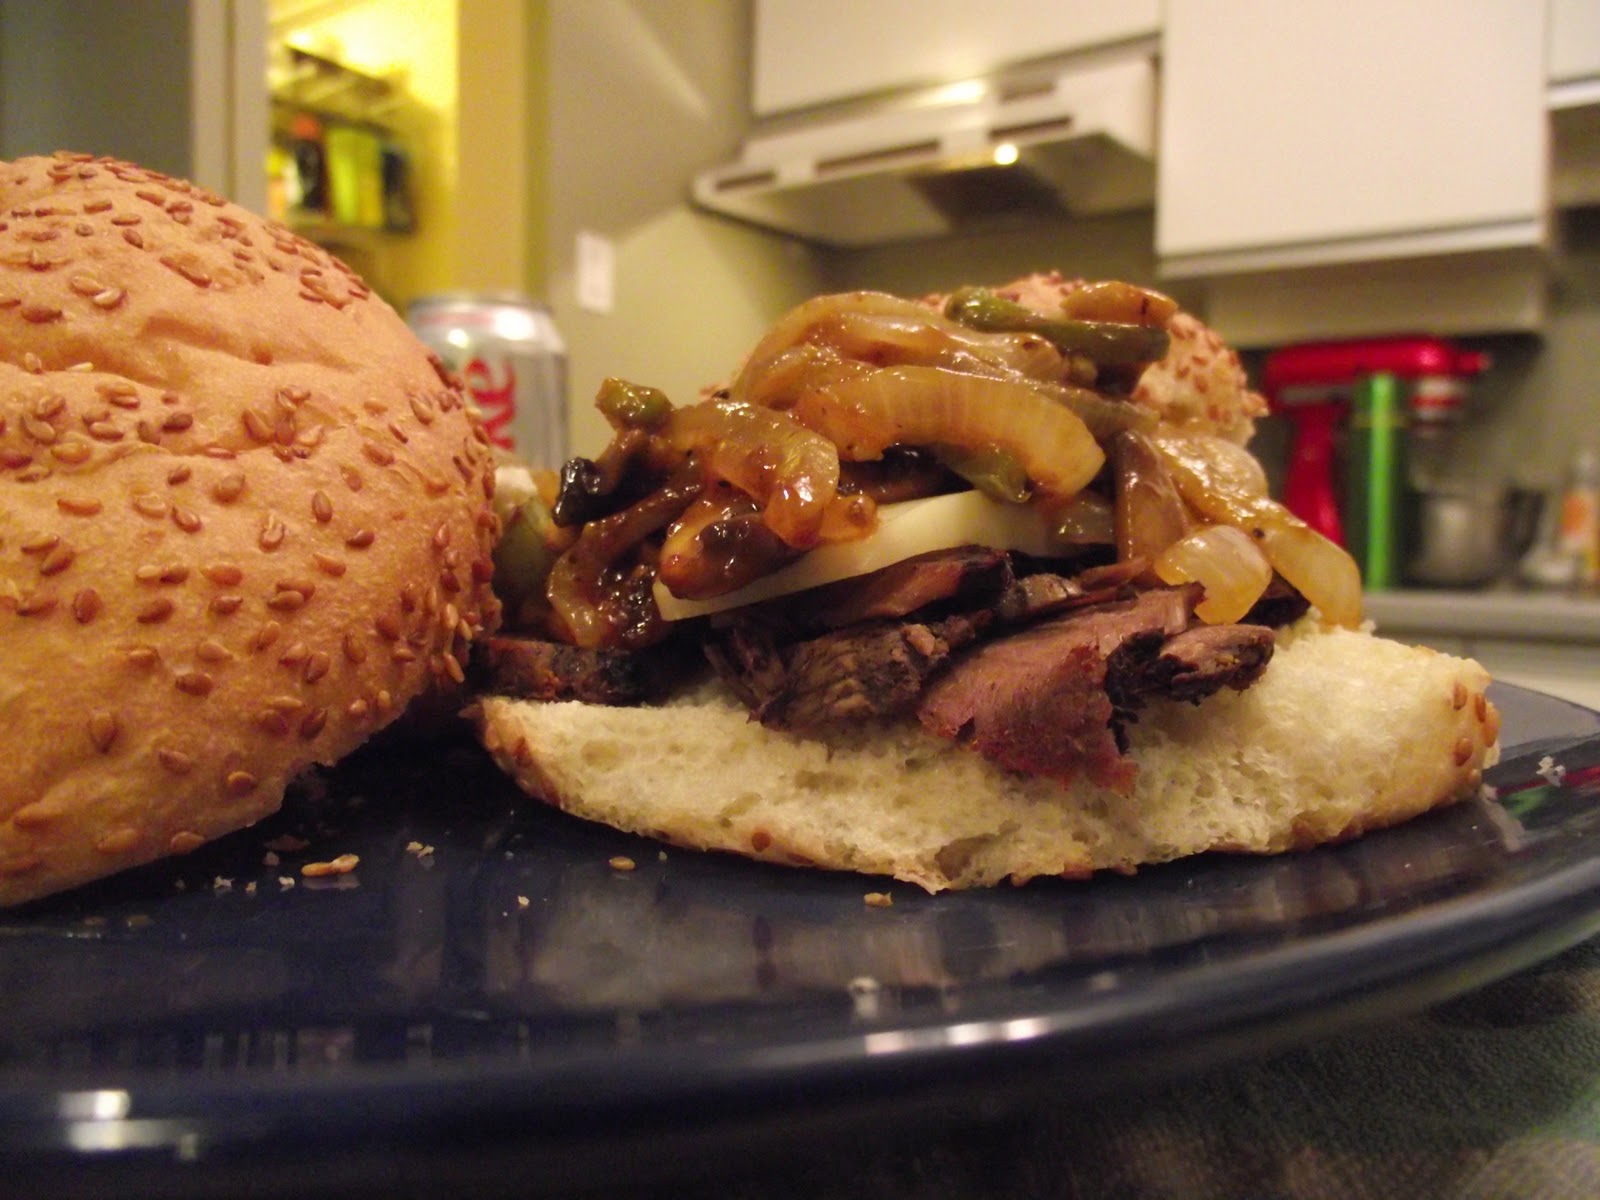
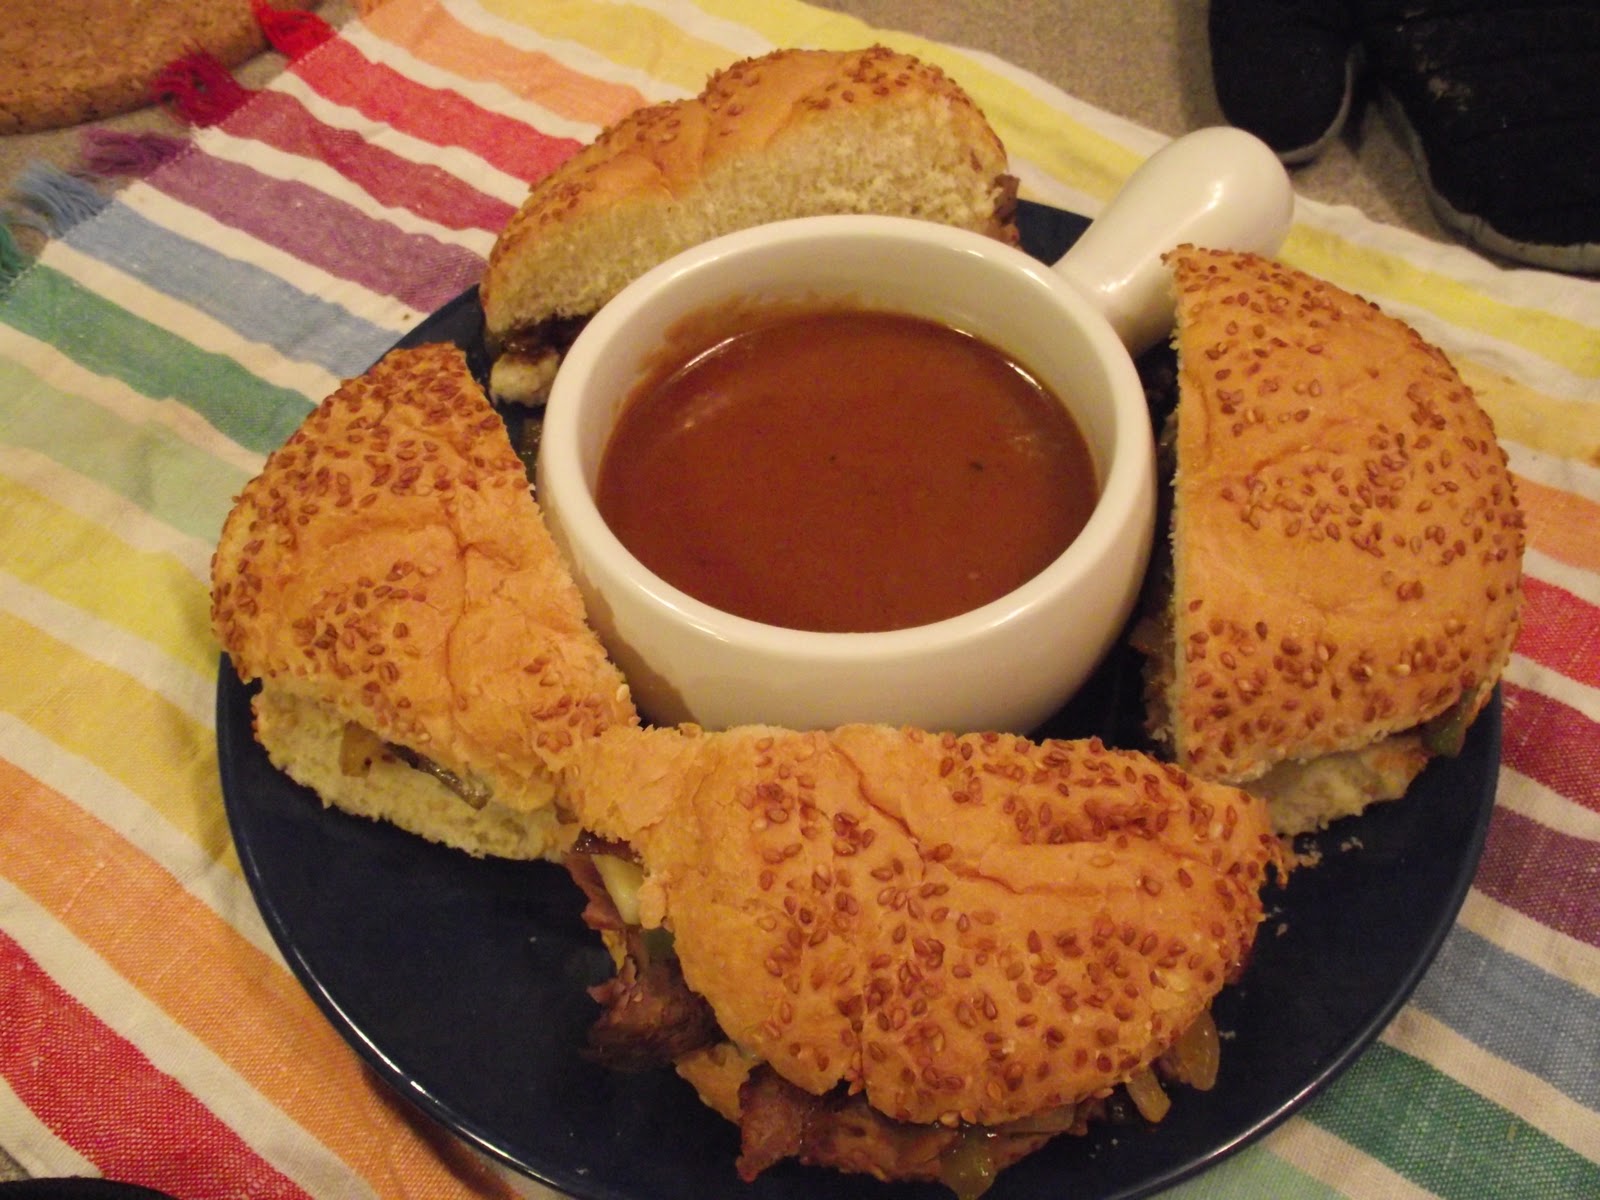
Leftover Deliciousness - Cheese Steak Dippers

The leftover. Many people love the leftover. Cook once, eat several times. Less work, more eating. I do not feel this way in the least. At most, dinner should be recycled once, for lunch the next day and then I don't want to see that dish again until the next time I make it.  That's just how I feel.

There are of course exceptions to this rule. Thanksgiving, Chrismas and Easter are amoung those exceptions. THese are times of year where you don't mind eating that leftover ham or turkey for days on end in various incarnations until you do mind. Until you get what once commercial has so eloquently coined "Turkey Brain."

The other time I don't mind leftovers is when they can be transformed in to something that is truely delicious. Something you'd make for the initial meal, only with leftovers the meal comes together more easily. One of these leftover miracles is what I like to call "The Cheese Steak Dipper."

This dinner is an excellent way to use up leftover beef, whether it is steak, roast beef or even ground beef.

Cheese Steak Dippers
11/2 - 2 cups of leftover beef, sliced thinly or crumbled (I used leftover roast beef)
1/2 large onion, sliced
5-6 mushrooms, sliced
1 green pepper, sliced
1 cup of shredded cheese of your choice
Dipping sauce of choice (I suggest you make up a package of Swiss Chalet Dipping Sauce)
4-6 crusty rolls
Vegetable Oil

Preheat your oven to 300 C.

In a frying pan, heat a tablespoon or two of oil over medium heat. Throw in your veggies, and saute until the onions are translucent and the mushrooms have cooked down. This will take 5-7 minutes. Set aside.


If you're using the Swiss Chalet dipping sauce, I would reccomend putting this on now too. Follow the directions on the package. I believe that involves measuring some water and oil into a pan, and heating it along with the sauce mix, to a boil.

While the vegetables are cooking, slice up your leftover meat. When the veggies are done and you've set them aside, heat up your meat in the same pan. This will only take 5-7 minutes, depending on the amount of meat you are warming.  You can add a tablespoon or two of water to the pan and put a lid on it. The steam will help keep the meat moist.

When your meat is almost warmed through slice your rolls and place them in the oven to warm.  Top each roll with some meat, veggies and cheese. Cut in half and dip away. Delicious.

This is also good with leftover chicken or pork.

mmmmmmmmmm

Tuesday, January 4, 2011

Happy New Year! A new year, and a new start!

Happy New Year everyone!  Here we are 4 days in, and its shaping up to be a good year.

I'm taking advantage of this time of the year to press the reset button on my blog. I apologize for the long absence, but this fall flew by, and was side tracked with the sinus infection that wouldn't end, and my dad (my most dedicated reader) had a heart attack which, no need to say, occupied my mind and thoughts for some time.  The sinus infection is gone, and I'm happy to say that after 9 weeks of rest and relaxation my Dad is back to work today, much healthier than he was before.

His heart attack was a wake-up call for my family that we need to be taking better care of ourselves. Healthy food is a great place to start.  With that in mind, and with an end to holiday leftovers in sight, I'm back to cooking from scratch in my kitchen.

Here's a quick recipe for a hearty soup, great to whip up on a Sunday to have for lunch all week. Sorry no pictures this time, but rest assured its a lovely orangy colour and is delcious to boot!

A note on lentils:  There are many types of lentils, I've chosen red because I think they're pretty. This soup would work equally well with other types.  Lentils are well priced (a bag of dried lentils, enough for many pots of soup, will run you maybe $3), high fibre and very filling. They're a great way to round out a meal or a soup.

Curried Red Lentil Soup
1 large carrot, peeled and chopped
1 celery stalk, peeled and chopped
1 medium onion, chopped
2 inch piece of ginger, peeled and finely chopped
1c. red lentils, rinsed and sorted**
4c. water
1 tsp. each cinnamon, cumin, curry powder
1 bay leaf
3/4 c. crushed tomatoes or  leftover marinara sauce
Canola oil (or whatever mild tasting oil you might have)
Low Fat Greek Yogourt
Lime, cut in to wedges

**make sure you rinse them to get the dust off, and have a peek through to make sure there are no stones or miscoloured lentils)

1. Saute in a large pot, the carrot, onion, celery and ginger until softened, about 5 minutes.
2. Add in spices, and bay leaf. Saute an additional 2-3 minutes.
3. Add in tomatoes, lentils and water. Mix well.
4. Simmer for 45-50 minutes. This will look more like a stew than a soup.
5. Serve with a dolop of greek yogourt and a squeeze of lime.

There you go, a heart healthy, delicious recipe, ready to fill your lunch bag in just under an hour!

Monday, September 27, 2010

Hunkering Down for Winter Part 2: Your Very Own Tomato Sauce

Ok, so since it never stops raining in Ottawa these days, and since there's no denying that its officially Fall (check the calendar and then come and find me - we'll pout together) it's time for another installment of Hunkering Down for Winter.

So my man-friend was away this past weekend which left me with wondering what to do with all of my newly discovered free time. Of course, I turned to my good friend the kitchen.

Tomato sauce is honestly and sincerely way easier to make than you think it is. Way easier. Also, the ingredient list is very short too. This is certainly something you can whip up right when you want it, no need to prepare it ahead of time. I just like to have a few cups on hand in the freezer.

Your Very Own Tomato Sauce
2 cans (28oz) of stewed, diced or crushed tomatoes (San Marzano are yummy, but whatevers cheapest works too)
2 stalks of celery, roughly chopped
1 large carrot, peeled and roughly chopped
1 medium onion, roughly chopped
2-3 cloves of garlic, roughly diced
2-3 tsp of honey (or more or less to taste)
2 tbsp olive oil
s&p to taste
chili flakes (optional)

1. Heat a dutch oven over medium heat, and add the oil and chili flakes.
2. Throw in your onions, and let them sweat for 3-5 minutes.
3. Add in the celery, carrots and garlic. Let this work for another 5-7 minutes.
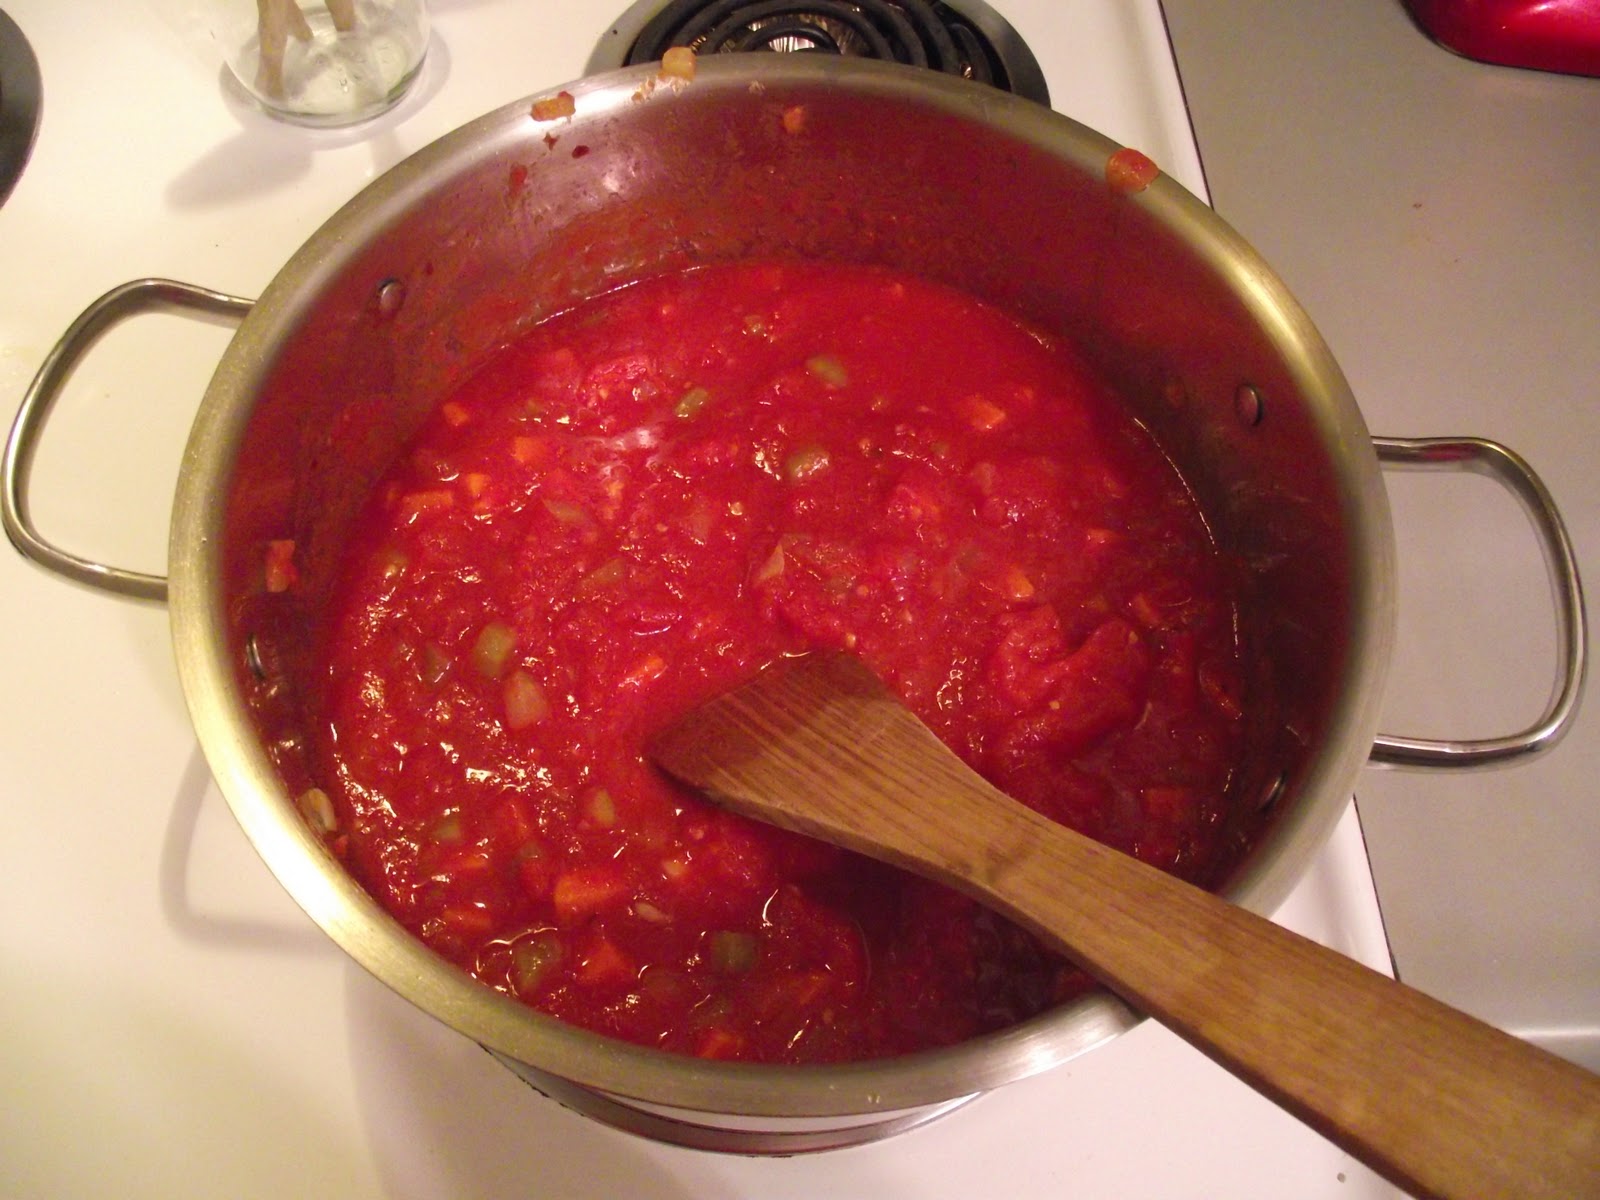
4. Add in your tomatoes and mix everything up well. If you used stewed tomatoes, or diced tomatoes crush them against the side of the pot with your wooden spoon. Do not break your spoon like I did (RIP favourite wooden spoon, RIP).  Don't get bent out of shape if you can't get the consistency you want, you're going to buzz it in the blender after anyways.

Before.
5. Let all of this bubble for at least 5 minutes, or if you're preparing it ahead of time let it simmer as long as you have.
6. Once its done simmering, buzz it in the blender. 

After.

If you're eating it now, add any other herbs or spices you might want (oregano, or basil are nice). If you're squirreling it away, let it cool completely divide it up in to 2 cup portions and put it in the freezer.

This is the base to any number of recipes: spaghetti sauce, meatballs and sauce, chili, tomato soup, stew.

If you want to make lots, this recipe doubles well.

Happy Eating!

Erin

Sunday, September 19, 2010

Fall Dinner (and left overs) for Two: A Fall Stirfry

As evidenced by the cooler weather, and seemingly unending rain, fall is most definately upon us. I don't know about you, but I'm enjoying it. Its nice to get back in to a routine, after weekend upon weekend of activity that was the Summer this year.

Today, I've got a yummy fall weeknight dinner for you. It comes together in about half an hour, and its pretty friendly on your pocket book too.

Fall Stirfry
1 small onion, chopped
2 carrots, washed and sliced 
2 potatoes, washed and sliced (you can use sweet potatoes if you want, I’ve used one of each) 
2 apples, washed and chopped
2 ribs celery, washed and sliced
½ blub fennel, washed and sliced (If you've never eaten it before, you should, its delicious!)
1 package of dinner sausages (honey garlic, bratwurst or Oktoberfest work nicely – maple flavoured breakfast sausages would also be nice)
½ c. apple juice or apple cider
2 tbsp. cider vinegar
½ tsp. Rosemary
½ tsp. Thyme
½ tsp. Fennel Seed, crushed
1 inch knob of ginger, grated
2 cloves of garlic
Salt and Pepper to taste

In a large sauté pan, or electric frying pan, sauté the sausages over medium heat until they’re cooked through. Set them aside.


Have a look at your pan and decide if there are enough drippings to cook up your vegetables, or no. If not, add a bit of butter or canola oil. Then throw in your vegetables, and stir them around to make sure they all get a bit of drippings / butter / oil love. Add the rosemary, thyme, fennel seed, ginger and garlic at this time too. Let cook covered, for about 10 minutes, or until things start to get tender. In the meantime, slice up your sausages.


Once your vegetables are about ¾ of the way cooked, add your sausage back to the pan. Deglaze the pan with your vinegar (it will help lift all the brown bits from the bottom of the pan – the brown bits are the extra tasty parts, and you want them incorporated in the dish – really you do). This will steam a fair bit. Make sure you get your hand out of the way. Next, add in your apple juice and salt and pepper to taste. Cover the pan again, and cook for another 5-10 minutes.

It should be done now. Check the taste and add a bit more salt and pepper if necessary. This is delicious with some bread and butter.


This dinner will cost you between $7 and $10 depending on where you source your ingredients, and if you get them on sale like I did. For two people, that's between $3.50 and $5 a serving. This will probably feed 4 for dinner, at $10 for the meal, thats an average of $2.50 a person. Not too shabby if you ask me!

Leftovers are good for lunch. This is the type of dish that gets better as it sits as the ingredients soak up the juices.


Happy Eating!

Wednesday, September 8, 2010

Hunkering Down for Winter Part One - Meatball-o-rama!

It’s the last week of Summer. Well, maybe not officially, I guess fall doesn’t officially start until somewhere around the 20th, but we’re already September, and Labour Day is behind us , and for me that's the first loud signal of fall. I might be well past my school years, but I think I’m still running on that calendar. The past weekend was Labour Day weeknd, the last long weekend of Summer and while most people were escaping the city for one more day at the beach, or one more weekend at the cottage, we used the weekend to unpack the last of the boxes (urrrmmm, we moved last October...) and to start thinking about how we can use the long weekend to stock the freezer for the fall and winter months ahead. Some people may think I’m crazy but I really prefer the fall and winter, and I like to get ready for them by stocking my freezer so that I’m prepared for whatever may come.


On my list so far are meatballs, tomato sauce (not to be confused with spaghetti sauce), and chicken stock. I’ll make these over the next few weeks, and I’ll probably take another weekend later this fall and make Chili, Spaghetti Sauce and maybe stew. Today’s post is about meatballs.


As a kid, I hated hamburger. Just ask my mom - picture this, toddler Erin (who incidentally looks exactly like adult Erin, but just smaller), sitting in her highchair, eating spaghetti or maybe lasagna, but spitting out the crumbled hamburger...true story. Another true story - I didn’t willingly eat a hamburger until I was probably 17. It’s still not my favorite meat, but it is versatile, inexpensive, and when prepared well, it has the potential to be quite tasty. For most recipes calling for ground meat, I use ground turkey. I really prefer it, it makes meals lighter and easily takes on the flavour of whatever you’re cooking it in. However, meatballs are another story. Meatballs need beef.


Meatballs aren’t just for eating with spaghetti either. Although, meatballs and spaghetti is a delicious meal. At our house we use these little nuggets of yumminess as the basis for a number of meals: meatballs with Diana Sauce and fried rice, meatball casserole, meatballs and tomato sauce with garlic bread, meatball subs, etc. No need to worry, these recipes will make appearances over the winter.


So here it is, my recipe for:


Copious Amounts of Meatballs...
2/3 Club Pack of Lean Ground Beef (you can use the other 1/3 for a lasagna like I did), or two to three regular sized packages
2c. Breadcrumbs*
2 large Carrots
2 medium Onions
3 ribs of Celery
1/2 green pepper
4 Cloves Garlic
4 Eggs
1/2 shot glass Worcestershire sauce (I really used a shot glass)
1 tbsp honey mustard
1 tsp. black pepper
1 tsp. salt
1 tsp. chili flakes

*But Erin, I don’t have any bread crumbs, you say? Well - do you have bread? Yes? Then you can have bread crumbs in a few minutes. Take a few pieces of bread (doesn’t matter if its white, brown, multigrain or rye - all are good, but a stronger bread will alter the flavour of your dish a bit), the crustier, the better, and pop it in the oven at 250F for about 5 minutes, just to dry it out a bit. Tear it up, and buzz it in a food processor or blender until it is the consistency you want. For this recipe, you will want them very fine.

1. Buzz all of veg (carrots, onion, celery, green pepper, garlic) in a mini or regular sized food processor. If you don’t have one, you should get one, they’re very useful and will only run you about $25. If you don’t have either of those things, but you do have a blender I suppose you could try that. If all else fails, chop everything very, very finely.

Ingredients, all measured out in a super big bowl.
2. Preheat your oven to 375F.

3. Mix all ingredients together in a very large bowl. Use your hands. Its the only way to ensure that the ingredients get mixed all of the way through. If the meat mixture is overly crumbly (as in, you’re not sure if its going to hold together) then add another egg. If its too wet, add some more bread crumbs. Don’t over mix, this will make your meatballs tough. You just want your veg to be evenly distributed. I use lean hamburger, its lower in fat than medium, or regular, but still has enough fat in it that your meatballs won’t be dry. If you prefer a different type of hamburger, knock yourself out, you’ll just need to adjust your liquids (eggs) accordingly, and be prepared for either a drier, or greasier meatball.

2/3 of a club pack of ground beef - in case you were wondering what it looked like.
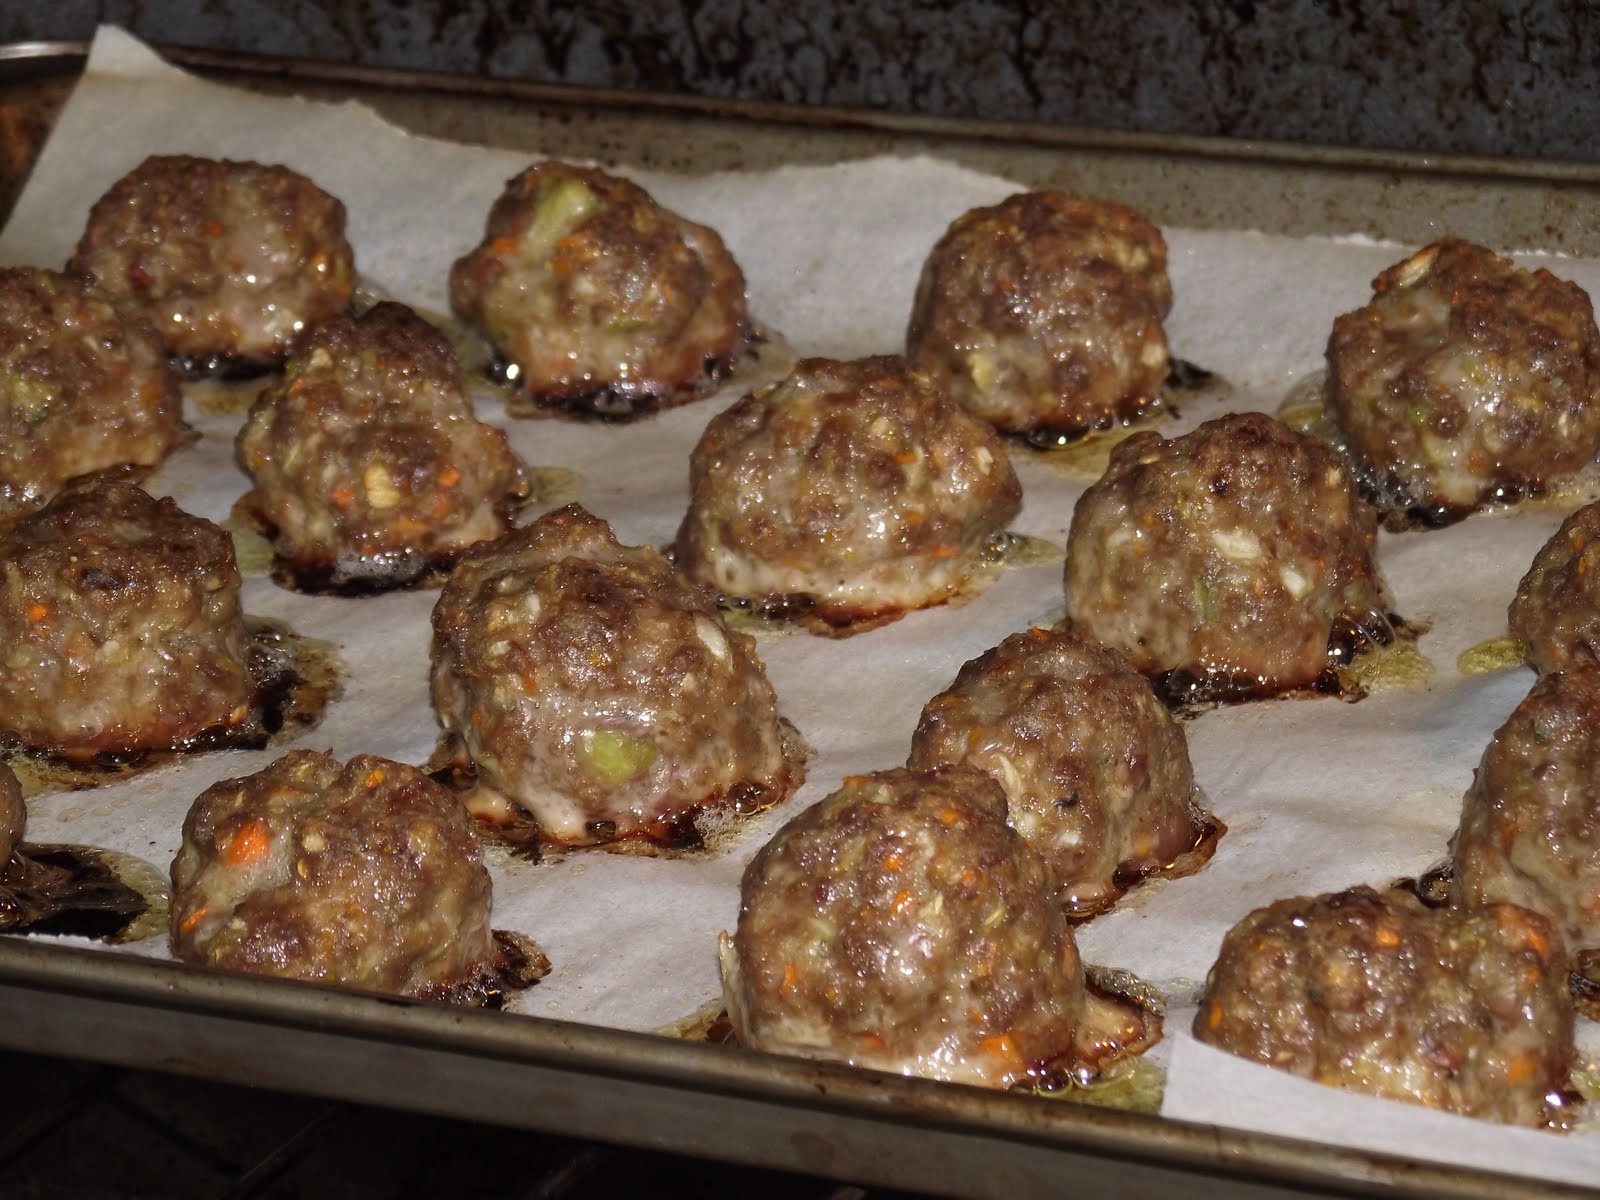
4. Line several baking sheets with parchment paper or tin foil. Parchment paper is better, as your food won’t stick to it. Leaving about a centimetre and a half between meatballs, roll them out and place them on the trays. I like to make mine about 2-3 cm around.

Meatballs ready for the oven.
5. Bake them, two trays at a time if you can for 20-30 minutes, until they’re cooked through (i.e. not pink on the inside anymore, you’ll have to sacrifice one...)


6. Set them aside to cool. Once they’re fully cooled, put them in a freezer bag and throw them in the deep freeze for a week night in the future, when you’re too tired to do anything but open up the bag of meatballs, and heat them in a sauce of some kind. Really, since you’ve already cooked them through, all you need to do is heat them up! It’s important to use a freezer bag, and not tupperwear, because they will become freezer burnt in the tupperwear!

On top of spaghetti, all covered in cheese!
I lost my poor meatball, when somebody sneezed!
Happy Eating!

Erin

Tuesday, August 31, 2010

MMMMMMMMM Butter Chicken!

For those of you wondering, one of our elevators is now functioning, so life in our kitchen is more or less back to normal after a week of quick meals and take out. Today, I’ve got one of my very favourite recipes to share with you. I don’t make it a lot, but its something that is worthy of cravings, and this week I’m craving it something terrible.

At my house growing up we ate a pretty standard rural Ontario diet. A mixed British - Scottish and Irish background meant that meat and potatoes and at least one veggie were on my dinner plate almost every night, except for those occasions where we had spaghetti, lasagna, or a stirfry. Every Sunday, rain or shine, we had a roast of some sort, usually beef, but sometimes pork, or chicken.

Peterborough in those days didn’t offer a whole lot of ethnic food choices - you could order Chinese food, or Pizza. Those were your takeout options. So when I moved to Ottawa for school, I was intrigued by the plethora of different food choices that were right at my door, and I went to work, sometimes a little hesitantly, at expanding my palate.

Curry sounds exotic, and the sound of it can sometimes be intimidating for those of us who have never tried it before. But when you get right down to it, at its most basic level, its really just a stew. The elements that make it exotic are the flavourings and spices used to give it its robust taste. Now admittedly, I’m not a big fan of things super spicy, so I tend to stick to the milder varieties, but you could always throw in a bit more spice if you wanted. Curry doesn’t have to be spicy, and the recipe for the one below is mild. Super spicy curries do exist, I tried one by accident while we were China this past June. If you see Jon, ask him about it. The whole table was laughing at the expression on my face, and I’m pretty sure my eyes were watering! Note to self: the spice levels in Asia, are not the same as in Canada! That’s for sure!

This recipe is adapted from a cookbook called Eat, Shrink and Be Merry by Janet and Greta Podeleski. The recipe can be found on the Food Network website, here. Interestingly enough, the recipe that is listed in the cookbook is a bit different than this one, although they're called the same thing. I've sort of melded the two together and made my own changes as well.

To speed up the recipe a bit, I’ve opted not to marinate the chicken. This choice also cuts down on the spice factor. I also prefer to use all white meat, this is just a personal preference. There is no reason not to use what you’ve got on hand, or what you prefer. You could speed up the recipe even further by using a store bought rotisserie chicken. This option is actually probably more cost effective as well, as you don’t need to pay for the electricity to cook it, boneless skinless chicken is like gold these days, and if you purchase the whole chicken, you also have the bones for stock. (II’ll publish a posting on the virtues of using a whole chicken later this fall.)

You may note that this recipe doesn't in fact have curry in it and you may be wondering why I'm calling it a curry...we'll I guess it isn't, but I think it belongs in the same food family, and for that reason I lump it in with curries.

MMMMMM...Butter Chicken!
2 cooked boneless, skinless chicken breasts roughly chopped, or 2 c. of left-over chicken
2 tbsp. butter
Colourfully beautiful spices!
1 c. chopped onions
2 cloves garlic, minced or 1 tbsp. minced garlic
2 tbsp. grated gingerroot
2 tsp. chili powder
1 tsp. ground turmeric
1 tsp. ground coriander
1 tsp. ground cinnamon
1 tsp. ground cumin
2 tbsp. tomato paste
1 can (28 oz/798 mL) diced tomatoes, including juice
2 tbsp. brown sugar
Salt and Pepper to taste
2/3 c. sour cream (I used fat-free, use whatever you have in the fridge - plain yogourt would also work)
1/2 c. milk (I used skim)
1tbsp. peanut butter
1 tbsp. minced fresh cilantro, or 1 tsp. dried
Hot cooked rice

Before you get started, a few notes on Ginger...
  • Keeping your ginger in the freezer allows it to be more easily grated. You don’t even need to peel it. It also allows you to keep some on hand without worrying about needing to use it before it goes bad.
  • If your ginger is fresh, you can easily peel it with a teaspoon. This will allow you to get around all of the knobs, and you won’t lose any of the flesh either.
  • You can purchase pre-peeled and minced ginger in the salad section of your grocery store. Garlic also comes like this. Some of you might be wrinkling your noses at the thought of using prepared items like this, but really there is no shame in it. Its a time saver, and your time is precious.
I sauteed my chicken with spices used in the rest of the dish.
1. Bake off, poach or saute the chicken breasts until cooked through. About 20 - 25 minutes. Dice and set aside. While the chicken is cooking you can make sauce. If you’re using long grain, or basmati rice, put it on to cook now.

2. In a large pot, over medium heat, melt the butter. Once the butter is melted and frothy, add the onions and garlic and sauté until tender. This will take about 5 minutes.

3. When the onions are translucent add the ginger, chili powder, turmeric, ground coriander, cinnamon and cumin. Cook for another minute.


Smells super yummy!
4. Add tomatoes, brown sugar, tomato pasted and salt and pepper. Turn the heat to it’s lowest setting and cover your pot. Let the mix simmer (not boil) for about 10 minutes, stirring occasionally. If you’re making instant rice, put it on to cook now.


5. Stir in sour cream, milk, pb and cilantro. Add cut-up chicken and mix well.


6. Cook just until chicken is hot. Serve over rice.


Mmmmmm...dinner!
Yes, if you’re cooking for two, this recipe will make leftovers (it will easily feed about 5 adults). But there won’t be copious amounts, and they’re of the type that is glorious for lunch the next day. It’s a lot easier to eat a brown bag lunch, when its something delicious that you’re looking forward to eating.

Cheers and happy eating!

Erin